Welcome to the world of large-format home entertainment! When upgrading your viewing setup, an auto projector screen offers a perfect blend of convenience and high-quality viewing. The term “auto projector screen” can refer to fully motorized models that drop down via remote control, or, as is common in many home and office environments, manual pull-down screens equipped with an internal auto-locking mechanism. These automatic features ensure a perfectly flat, tensioned surface without the hassle of permanent fixtures.
This comprehensive guide focuses specifically on the popular Pyle 72-Inch Manual Pull Down Projector Screen, a cost-effective and reliable option that utilizes a crucial auto-lock feature for customized display settings. We will walk you through every step, from selecting the right mounting hardware to mastering the auto-lock mechanism for the best possible cinematic experience.
Understanding Your Auto Projector Screen
Before diving into the installation, it is important to understand what makes a screen an auto projector screen and how the mechanical features work, particularly for a manual model like the Pyle 72-inch unit.
Manual vs. Motorized Auto-Screens
The projection screen market is broadly divided into fixed frames and retractable screens. Retractable screens are further categorized:
- Motorized (True Auto): These screens use an electric motor (hence, “auto projector screen”) concealed within the housing. They deploy and retract with the push of a button on a remote or wall switch. They are convenient but typically more expensive and require access to power.
- Manual Pull-Down (Auto-Lock): These screens are operated manually by pulling a handle or cord. The “auto” feature here is the internal spring mechanism and the locking system that allows the screen to hold tension and stop at any height. This is the mechanism employed by the Pyle 72-inch screen.
Choosing a manual auto projector screen is often ideal for renters, classrooms, or budget-conscious homeowners who still require a clean, retractable solution without complex electrical wiring.
Key Features of the Pyle 72-Inch Model
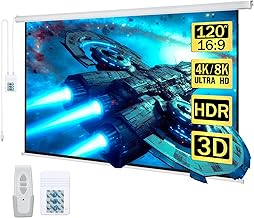
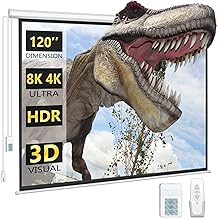
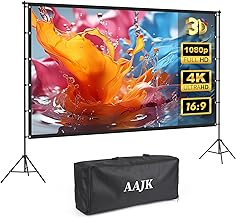
The Pyle 72-Inch Manual Pull Down Screen (Model: B0G6FH74JK) is designed for versatility and ease of use. It features a 72-inch diagonal viewing area with a standard 16:9 aspect ratio, suitable for modern movies and presentations. The matte white surface ensures excellent light diffusion and vibrant color reproduction, supporting 4K and HD projection quality.
The Auto-Lock Mechanism
The core functionality that qualifies this as an auto projector screen in terms of convenience is its sophisticated auto-lock mechanism. When you pull the screen down, the internal tension system engages. If you stop pulling and gently release the screen, the mechanism locks into place, allowing you to customize the height and aspect ratio (if needed) precisely. To retract the screen, a slight downward tug releases the lock, allowing the screen to smoothly roll back into its durable casing.
Step-by-Step: Setup & Optimization Guide for the Pyle 72-Inch Manual Pull Down Screen
Proper installation is paramount to achieving a flat, wrinkle-free projection surface. Follow these steps carefully to mount and optimize your new Pyle 72-inch auto projector screen.
Phase 1: Preparation and Safety
Safety and planning prevent costly mistakes during installation.
Required Tools and Hardware
Gather the following tools before starting the installation:
- Pencil and measuring tape
- Level (a laser level is ideal for long screens)
- Power drill and appropriate drill bits
- Stud finder (essential for wall mounting)
- Screwdriver or socket wrench
- Safety goggles
- Ladder or step stool
- Mounting hardware (screws, anchors, and brackets – ensure they are rated for the screen’s weight, typically included with the screen or sourced separately based on your wall material).
Choosing the Installation Location (Wall vs. Ceiling)
The Pyle 72-inch screen is versatile and can be mounted on a wall or suspended from a ceiling. Your choice depends on room aesthetics and projector throw distance.
- Wall Mount: The most common method. It keeps the screen flush against the wall and is easier to install if you have accessible studs.
- Ceiling Mount: Ideal for rooms with high ceilings or when mounting in front of existing décor (like a TV or window). Ensure you mount directly into ceiling joists or use heavy-duty toggle bolts appropriate for the ceiling material.
Critical Step: Measure the distance from the screen’s projected bottom edge to the floor. Ideally, the bottom of the viewing area should be at least 24 to 36 inches off the floor to ensure comfortable viewing for seated audiences. Use your projector’s specifications (throw ratio) to calculate the ideal screen placement before drilling any holes.
Phase 2: Mounting the Auto Projector Screen
The goal is to secure the screen casing perfectly level and stable to prevent distortion and ensure smooth operation of the auto projector screen mechanism.
Wall Mount Installation
- Locate Supports: Use a stud finder to locate two wall studs that span the width of the screen casing. Mark the center of the studs. If studs are unavailable, you must use heavy-duty wall anchors (e.g., toggle bolts) rated for the screen’s weight.
- Mark Drill Points: Hold the screen casing (or the mounting brackets, if separate) up to the wall. Use a level to ensure the top edge is perfectly horizontal. Mark the drill points for the mounting screws.
- Drill and Secure: Drill pilot holes. Attach the mounting brackets or secure the screen casing directly using the appropriate hardware. Ensure the screws are driven fully and the casing is snug against the wall.
Ceiling Mount Installation
Ceiling mounting requires careful attention to structural support, especially with an auto projector screen that utilizes a heavy spring mechanism.
- Find Joists: Use a stud finder to locate the ceiling joists. Mark the centers. Never rely on drywall alone for ceiling mounting.
- Mark and Drill: Determine the desired drop distance. Mark the drill points on the ceiling, ensuring they align perfectly across the width of the screen. Use the level.
- Install Brackets: Secure the ceiling brackets directly into the joists using lag bolts or heavy-duty screws.
- Attach Screen: Carefully lift the Pyle screen casing and attach it to the installed brackets. Double-check that all connections are secure.
Phase 3: Operating the Auto-Lock Feature
The primary benefit of this type of auto projector screen is the ability to easily deploy and retract it while setting the exact height you need. Mastering the auto-lock feature is simple but requires a gentle touch.
Deploying the Screen
- Grasp the Handle: Locate the pull handle or cord attached to the bottom bar of the screen.
- Pull Down Smoothly: Pull the screen down slowly and smoothly to the desired height. Avoid jerky movements, as these can prematurely trigger the locking mechanism or damage the internal spring.
- Engage the Auto-Lock: Once you reach the desired height, pull the screen down about another inch, then let it move up slightly (about half an inch). Release the handle gently. You should hear a soft click, indicating the internal mechanism has engaged the lock, holding the screen in place.
Locking the Screen at the Desired Height
The beauty of the auto-lock feature is its infinite positioning. You can adjust the vertical drop to match your projector’s image size perfectly, eliminating the need for excessive keystone correction.
- Adjusting Height: If the screen is too low, give it a quick, gentle tug downward to release the lock, let it retract slightly past the desired point, and then pull down again to re-engage the lock at the new, higher position.
- Ensuring Flatness: After locking the screen, step back and ensure the viewing surface is taut and flat. The tension mechanism should minimize wrinkles, crucial for high-definition viewing.
Retracting the Screen Safely
The most common mistake users make with manual screens is allowing them to snap back quickly, which can damage the screen material, the auto-lock mechanism, and the casing.
- Release the Lock: Pull the screen down slightly (about 1-2 inches) to disengage the internal locking mechanism.
- Control the Ascent: Once the lock is released, maintain a firm, but gentle, grip on the pull handle. Guide the screen slowly and steadily back up into the casing. Do not let go until the screen is fully seated in the housing.
- Final Check: Ensure the bottom bar is fully retracted and flush with the casing to protect the matte white surface from dust and damage.
Achieving Optimal Projection Quality
Having a perfectly installed auto projector screen is only half the battle. Optimization involves correctly aligning your projector to maximize image quality on the Pyle 72-inch surface.
Projector Placement and Keystone Correction
For the best image quality, the projector beam should hit the screen surface as perpendicularly as possible. This minimizes distortion and ensures uniform brightness across the entire screen.
- Center Alignment: Position the projector lens directly centered horizontally with the screen.
- Vertical Offset: Ideally, the projector should be mounted at the same height as the center of the screen, or utilize its built-in lens shift feature. If you must use digital keystone correction, use it sparingly, as it digitally stretches or compresses the image, slightly reducing resolution.
- Focus: Once the image is square on the Pyle screen, adjust the projector’s focus ring until the picture is crystal clear across the entire 72-inch diagonal area.
Tip: Since the Pyle screen has a black border, use this border as a guide. If the projected image perfectly fills the white viewing area without spilling onto the black border, your alignment is correct.
Screen Maintenance (Keeping the Matte White Surface Pristine)
The matte white surface of your auto projector screen is delicate. Dust, dirt, and oils can negatively impact image fidelity and color accuracy. Regular, gentle maintenance is key.
- Dusting: Use a soft, lint-free cloth or a compressed air canister to gently remove dust from the screen surface when deployed. Do this infrequently, as excessive rubbing can damage the gain layer.
- Cleaning Stains: For fingerprints or mild stains, use a small amount of mild soap diluted in distilled water. Apply the solution to a clean, microfiber cloth and gently wipe the affected area. Always test a small, inconspicuous area first.
- Storage: Always retract the screen fully when not in use. This protects the screen from environmental dust, pet hair, and accidental damage, ensuring the longevity of your investment. The durable housing of the Pyle unit is designed specifically for this protection.
Troubleshooting Common Auto Projector Screen Issues
Even with a reliable manual auto projector screen like the Pyle 72-inch model, you might encounter minor operational issues. Here are quick fixes for common problems:
Screen Won’t Retract Fully
This is usually due to the internal spring mechanism not having enough tension to pull the entire weight of the screen back up.
- Check for Obstructions: Ensure the casing is not warped or obstructed by mounting hardware.
- Reset the Spring Tension (Caution Required): If the screen stops retracting halfway, pull the screen down slightly further (about 12 inches). Give it a quick, firm tug downward, and then slowly guide it back up. This action sometimes “resets” the internal spring clutch. If this fails, the screen may need professional service or replacement, as adjusting the internal spring tension is often dangerous and voids the warranty.
Image Appears Too Dim
If the picture quality on your auto projector screen seems lackluster, the issue is rarely the screen itself (unless it is dirty or damaged), but usually the ambient light or projector settings.
- Control Ambient Light: The matte white surface of the Pyle screen performs best in a dark environment. Ensure all windows are covered and room lights are off.
- Check Projector Mode: Ensure your projector is set to its brightest mode (often labeled “Dynamic” or “Presentation”) if you cannot fully darken the room. For cinematic viewing, use “Cinema” or “Standard” mode.
- Verify Gain: The Pyle screen uses a standard matte white material with a 1.1 gain, offering a wide viewing angle. If you need brighter daytime viewing, you might consider an ALR (Ambient Light Rejecting) screen, but for most dedicated home theater setups, this screen is ideal.
The Importance of Screen Material and Aspect Ratio
When selecting any auto projector screen, two technical specifications—the screen material and the aspect ratio—are critical for your viewing pleasure.
Understanding Screen Gain
The Pyle 72-inch screen features a 1.1 gain matte white surface. Gain refers to the screen’s ability to reflect light back to the viewer. A gain of 1.0 is considered neutral, reflecting light equally in all directions (like a painted white wall). A 1.1 gain slightly boosts brightness without significantly narrowing the viewing angle. This is excellent for ensuring everyone in the room gets a clear, bright picture.
Screens with higher gain (e.g., 1.5 or 2.0) are brighter but tend to suffer from “hot-spotting” and have a narrower optimal viewing cone. For a versatile home theater experience, the 1.1 gain of this Pyle auto projector screen strikes a perfect balance.
Aspect Ratio: 16:9 for Modern Media
The 16:9 aspect ratio of the Pyle 72-inch screen is the standard for high-definition television and modern streaming content (Netflix, YouTube, Blu-ray). This ensures that movies and TV shows fill the screen perfectly without distracting black bars on the sides. While some older content or specialized presentations might use 4:3, 16:9 is the optimal choice for contemporary cinematic and gaming applications.
Advanced Installation Considerations
For users who want a truly seamless integration of their auto projector screen, consider these advanced tips:
Concealing the Housing
If aesthetics are a concern, especially in a living room, you can often build a decorative wooden soffit or valance around the screen casing. This conceals the hardware and the rolled-up screen when it is retracted, providing a clean, built-in look that rivals expensive motorized screens.
Acoustic Integration
While the Pyle 72-inch screen is not acoustically transparent, proper placement of your audio equipment can enhance the experience. If using a soundbar or center channel speaker, position it immediately below the bottom edge of the screen when deployed. This keeps the audio aligned with the visual action, enhancing immersion.
For more complex setups involving surround sound, ensure that the retracted screen housing does not interfere with ceiling-mounted speakers or block sound waves from reaching the audience.
Conclusion
The Pyle 72-Inch Manual Pull Down Projector Screen is an excellent example of an accessible and high-performing auto projector screen. By understanding its auto-lock mechanism and following these detailed setup and optimization steps, you can ensure a professional, wrinkle-free viewing experience every time. Whether setting up a temporary movie night in the backyard or installing a permanent home theater solution, this screen provides the quality and convenience needed for stunning large-screen projection.
Enjoy your newly optimized home cinema!