The scent of freshly cut grass mingled with the morning dew as I stared at the blank wall of my garage. Today was the day I was finally setting up the centerpiece of my summer entertainment plan: the massive 120-inch portable movie screen. But before I could enjoy a single frame of high-definition content, I had to master the math. This is where the projector screen calculator stepped in, turning a daunting installation into a precise, enjoyable project.
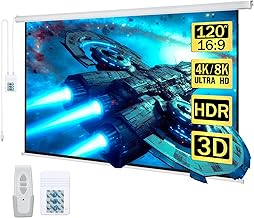
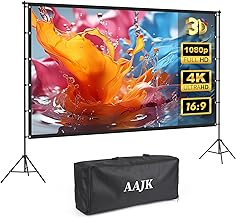
My chosen screen for this endeavor was the versatile and highly-rated Outdoor-Projector-Screen-with-Stand – 120 inch Portable Projector Screen. It promised 4K HD quality and easy setup, but “easy” is subjective when you’re dealing with optimal viewing geometry. The goal wasn’t just to get an image on the screen; the goal was cinematic perfection, achieved through meticulous calculation.
Chapter 1: The Morning Calculation (Understanding the Calculator)
My first task of the day began not with assembly, but with coffee and computation. I pulled up my preferred projector screen calculator online. This tool is indispensable because it eliminates guesswork, ensuring the image fills the screen perfectly without distortion or wasted light.
Why the Projector Screen Calculator is Essential
Many people assume they can simply place the projector anywhere and use digital keystone correction to fix the image. While modern projectors are forgiving, relying on digital correction degrades image quality, often softening the edges or reducing the overall pixel count. The calculator helps you achieve a native, undistorted image, maximizing the 4K potential of a screen like the 120-inch model.
Understanding the Geometry of Projection
A projector screen calculator primarily works by relating three variables: screen size (diagonal), aspect ratio, and throw distance. Since I already had the screen (120 inches, 16:9 aspect ratio), I needed the calculator to tell me the correct throw distance for my specific projector.
Key Inputs: Throw Ratio and Aspect Ratio
The most critical piece of data needed for the calculation is the projector’s throw ratio. This ratio (distance / width) determines how far the projector needs to be placed from the screen to achieve a certain image width. My projector has a throw ratio range of 1.3 to 1.5. This range gives me flexibility, but I prefer to use the middle of the range, say 1.4, for a crisp image.
Next, the aspect ratio is crucial. My screen is 16:9, the standard for modern HD content. If I had a 4:3 projector (common in older office models), the calculator would immediately show me how much of my 16:9 screen would be unused, or conversely, how much the image would overlap the screen boundaries if stretched.
Using the calculator, I plugged in the numbers:
- Screen Diagonal: 120 inches
- Aspect Ratio: 16:9
- Projector Throw Ratio: 1.4
The calculator instantly returned the required image width (approx. 104.5 inches) and, most importantly, the required throw distance: approximately 12.2 feet. This number became my blueprint for the entire afternoon.
The Distance Dilemma (Throw Distance)
Knowing the precise 12.2-foot distance solved half the problem. The other half involved the offset—the vertical placement of the image relative to the lens. Most calculators also provide this offset number, crucial for mounting the screen at the correct height so that the audience isn’t straining their necks.
The recommended viewing height generally places the bottom edge of the screen about 24 to 36 inches off the ground for outdoor or large room viewing. Since my projector had a slight upward offset, the calculator confirmed that placing the bottom edge at 30 inches would align the image perfectly with the 120-inch screen’s center, minimizing the need for any digital tilt correction.
Chapter 2: Setting the Stage (Unboxing the 120-Inch Screen)
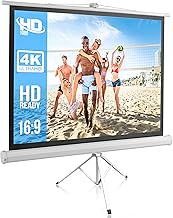
With the calculations complete, it was time to move the physical components. The Outdoor-Projector-Screen-with-Stand – 120 inch Portable Projector Screen arrived neatly packed in its carry bag, emphasizing its portability—a key feature for anyone planning backyard movie nights or presentations.
Unpacking and Initial Impressions
The screen material itself felt sturdy, designed to be wrinkle-free, which is essential for maximizing image quality. A wrinkled screen surface can scatter light unevenly, ruining the sharpness calculated by the projector’s optics. The inclusion of a robust stand meant I wouldn’t have to rely on hanging the screen from a permanent structure, offering the flexibility the calculation demanded.
The Importance of Screen Material
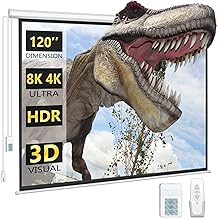
While the projector screen calculator handles the geometry, the screen material dictates the final visual experience. This 120-inch screen is optimized for 4K HD projection. For large screens like this, the material needs to be highly reflective and perfectly flat to ensure every pixel projected from the lens hits the viewer’s eye correctly. The quick assembly frame of this portable model uses tensioning mechanisms to achieve that crucial flatness.
Calculating the Ideal Viewing Height
My earlier calculations suggested a 30-inch bottom edge height. I used a tape measure and marked the spot on the wall where the screen would sit. The stand system for this portable screen allowed for adjustable height, making it easy to hit that 30-inch mark exactly. This alignment is critical, especially when dealing with the high contrast and sharpness required for 4K content.
Viewing Angle and Seating Distance
The projector screen calculator isn’t just about projector placement; it also helps determine optimal seating. For a 120-inch screen, the generally accepted optimal viewing distance (where the image fills your field of vision comfortably) is about 10 to 15 feet. Since my calculated throw distance was 12.2 feet, placing the seating just behind the projector meant the audience would be in the “sweet spot” for immersion.
- Calculated Throw Distance: 12.2 ft
- Optimal Seating Zone: 10–15 ft
- Conclusion: Placing the audience at 14 feet is perfect.
Screen Gain and Ambient Light Consideration
The calculator often includes fields for screen gain and ambient light rejection (ALR). While this specific 120-inch screen is a standard matte white (high gain, typically 1.1), understanding its performance in different light conditions is key. Since I was setting up outdoors, I knew I had to wait until dusk. If I were using an ALR screen (which costs significantly more), the calculation might allow for a brighter image even in slightly lighter conditions, but for a standard portable screen, darkness is mandatory for optimal contrast.
Chapter 3: The Afternoon Setup (Putting Math to Work)
The frame clicked together effortlessly. I snapped the 120-inch screen material onto the frame, pulling it taut to eliminate any potential wrinkles. The stand secured the frame firmly in place, ready for the moment of truth: positioning the projector.
Placing the Projector: Hitting the Throw Distance Target
I measured 12.2 feet back from the screen and set up the projector stand. This precise measurement, derived from the projector screen calculator, ensured that the projected image would perfectly match the dimensions of the 16:9 screen without any overscan or underscan. I used a laser measure to confirm the distance down to the inch, recognizing that even a few inches off could require minor keystone adjustments later.
Why Precision Beats Digital Correction
Precision is paramount. If the projector is too close, the image is too small; too far, and it overflows the screen borders. Digital keystone correction can shrink the image to fit, but this involves the projector discarding pixels, effectively reducing the resolution you paid for. By trusting the calculator and hitting the 12.2-foot target, I guaranteed that the projector was operating at its native resolution, providing the sharpest possible 4K picture on the 120-inch surface.
Keystone Correction vs. Physical Alignment
Since I followed the calculator’s offset recommendations for height, the image lined up almost perfectly horizontally and vertically. I only needed minor focus adjustments, not the heavy keystone correction that plagues hastily set up systems. This minimal adjustment preserved the integrity of the image.
Projector Screen Calculator for Fixed Installations
While this was a portable setup, the principles derived from the projector screen calculator are even more vital for permanent installations. If you are mounting a fixed-frame screen (like a dedicated home theater setup), the calculation must be done before any drilling begins. The calculator ensures that the fixed screen is positioned exactly where the projector’s image lands, making the entire system harmonize perfectly.
Securing the Screen (Indoor vs. Outdoor)
The portability of the 120-inch screen is a huge advantage, but it necessitates stability. For this outdoor setup, the stand included stakes and tie-down ropes. While the calculation doesn’t directly address wind resistance, ensuring the screen is taut and anchored is the physical manifestation of the geometric preparation. A moving screen defeats the purpose of precise throw distance calculation.
Setting Up the 120-Inch Portable Screen: A Checklist
- Calculate: Use the projector screen calculator (Throw Ratio, Screen Size, Aspect Ratio) to determine the exact throw distance (12.2 ft) and vertical offset (30 inches).
- Measure: Mark the projector placement and the screen height.
- Assemble: Put the screen frame and stand together, ensuring the screen material is taut and wrinkle-free.
- Position: Place the screen at the calculated height and anchor the stand securely.
- Align: Position the projector precisely at the calculated throw distance.
- Test: Project a test pattern to confirm the image perfectly fills the 16:9 frame.
Chapter 4: Prime Time Performance (The Result)
As the sun dipped below the horizon, I powered up the projector and loaded a high-bitrate 4K movie trailer. The image snapped into focus, filling the entire 120-inch screen from corner to corner. There were no black bars on the sides, no cutoff edges, and the sharpness was breathtaking. The math had paid off.
Reviewing the Calculated Image Quality
The difference between a guessed setup and a calculated setup is stark. Without the projector screen calculator, I might have placed the projector 10 feet away, forcing me to zoom out and use heavy keystone correction. That would have resulted in a visibly softer image, particularly noticeable on the fine details of the 4K content.
The Role of the Calculator in Minimizing Light Loss
When the image perfectly matches the screen size, you maximize the light output (lumens) of your projector. Any light that misses the screen is wasted. Because the calculator helped me align the image perfectly with the 120-inch reflective surface, the picture was noticeably brighter and the colors richer than if the image had been projected onto a smaller area of the screen or, worse, bled onto the black border or surrounding wall.
The Importance of Future-Proofing (4K/HD Ready)
The 120-inch screen is explicitly designed for 4K HD viewing. When investing in high-resolution equipment, you must ensure every component supports that resolution optimally. The projector screen calculator is arguably the cheapest and most effective tool for ensuring that your expensive 4K projector actually delivers 4K quality on your screen. It bridges the gap between hardware capability and physical reality.
Beyond Movies: Gaming and Presentations
This calculated setup isn’t just for cinematic viewing. For large-format gaming, latency and distortion are critical issues. A perfectly aligned image, achieved through the calculator, means minimal processing lag from digital correction, providing a smoother, more responsive gaming experience on the massive 120-inch screen. Similarly, for outdoor business presentations or large gatherings, the clarity and lack of distortion ensure professional results.
Final Verdict: The Power of Precision
My day with the Outdoor-Projector-Screen-with-Stand – 120 inch Portable Projector Screen was a testament to the fact that preparation is key to superior home theater performance. The setup was quick, not because I rushed, but because the projector screen calculator provided the precise measurements needed before I even opened the box. If you are serious about maximizing the visual impact of your projector, whether it’s a budget model or a high-end 4K unit, integrating the calculation step is non-negotiable.
The calculator transforms guesswork into geometry, guaranteeing that your 120-inch portable screen delivers a true cinematic experience, perfectly framed and brilliantly displayed.
Get Started with Precision Projection
Ready to experience your movies and games on a grand scale without compromising quality? The 120-inch screen I used provides the perfect canvas, but remember: the magic starts with the math.
Product Spotlight:
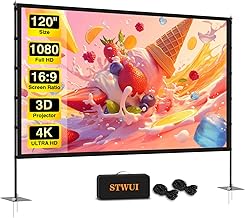
Outdoor-Projector-Screen-with-Stand – 120 inch Portable Projector Screen
This 120-inch, 16:9 screen is 4K HD ready and comes complete with a lightweight stand and carry bag, making it ideal for both calculated indoor installations and portable outdoor movie nights. Its wrinkle-free material ensures the clarity you demand after perfecting your throw distance calculations.
Key Features:
- Size: 120 inches diagonal.
- Aspect Ratio: 16:9 (Standard cinema format).
- Portability: Lightweight frame and stand included.
- Quality: Supports 4K HD projection.
Invest in precision today and transform your viewing experience.