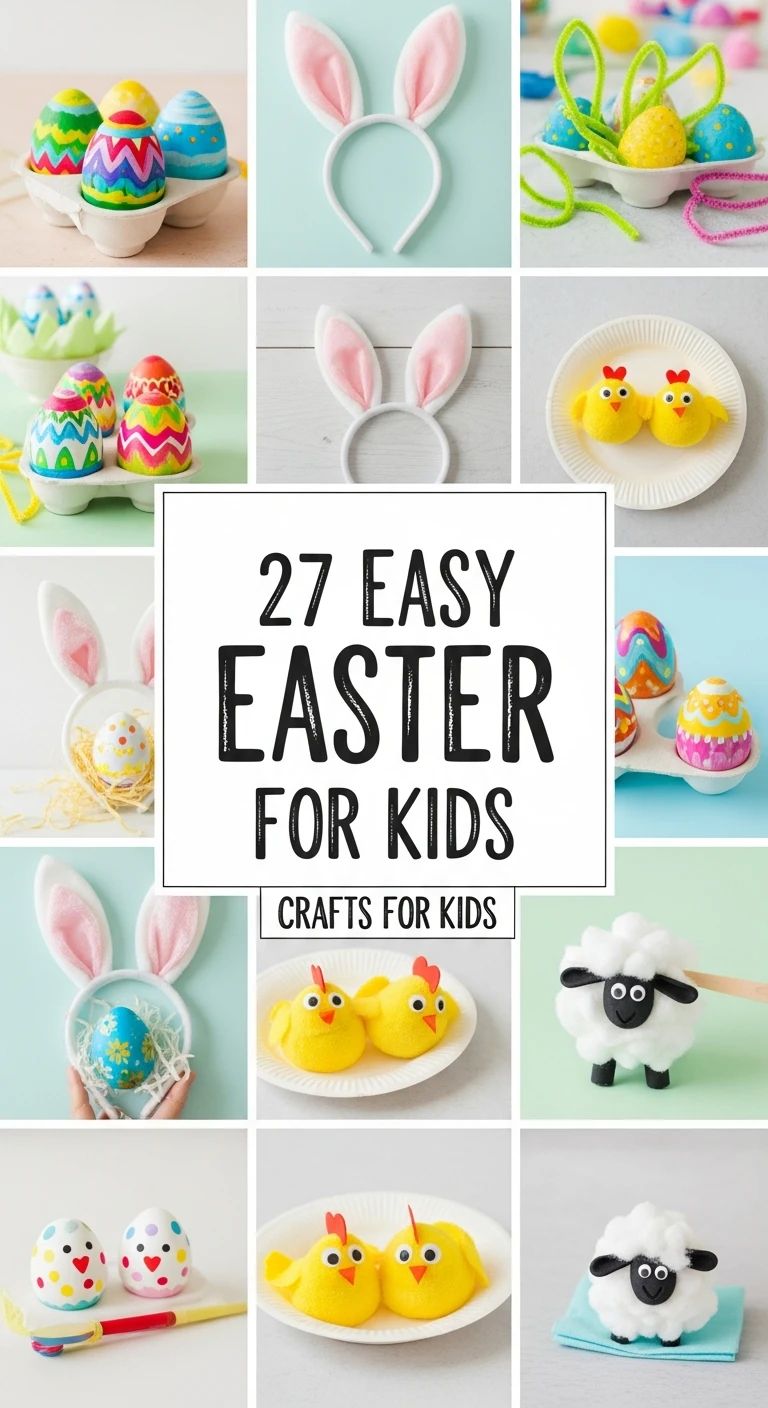
Hop into spring with 27 simple and fun Easter crafts! From adorable sock bunnies to colorful egg art and DIY decorations, these projects are perfect for all age.
Easter is the perfect time to embrace creativity, bringing bright colors and spring themes into your home. Engaging children in holiday crafts is not only a fantastic way to celebrate the season but also a wonderful opportunity to develop fine motor skills, encourage imaginative play, and create lasting family memories. Whether you are looking for simple projects suitable for toddlers or slightly more involved ideas for older children, this comprehensive list of 27 easy Easter crafts provides plenty of inspiration. We’ll be using common household items and inexpensive materials like paper plates, toilet rolls, and pipe cleaners, ensuring that you can start crafting right away without a trip to a specialty store. Get ready to transform everyday supplies into charming bunnies, chicks, eggs, and flowers that will brighten up your Easter celebration.
1. DIY Sock Bunny Plushies
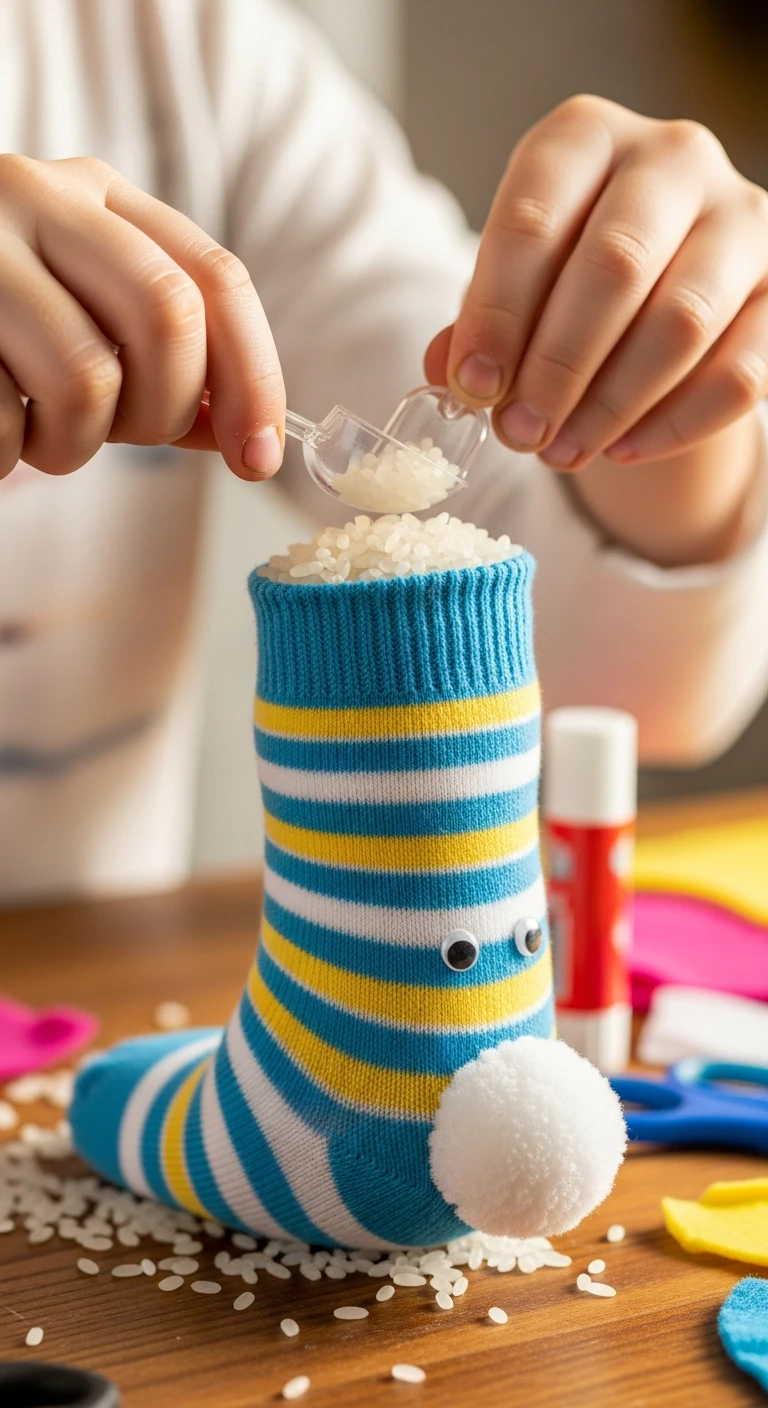
Create charming, no-sew bunny plushies using old socks and rice or dried beans as filler. Start by selecting a clean sock, preferably one with a fun pattern, and fill the toe area about two-thirds full with your chosen filler material. Secure the opening tightly with a rubber band or twine. The remaining portion of the sock will be used to form the ears; cut the top half of the sock down the middle, creating two strips, and then round the edges to form pointed ears. You can use permanent markers or small felt pieces attached with hot glue (adult supervision required) to add facial features, such as eyes, a nose, and whiskers. These simple plushies make wonderful, weighted desk decorations or small gifts, offering a tactile crafting experience that even older kids will enjoy refining with unique embellishments like ribbons or pom-pom tails. The use of weighted filler also gives them a satisfying, floppy feel, unlike traditional stuffed toys.
2. Paper Plate Easter Baskets
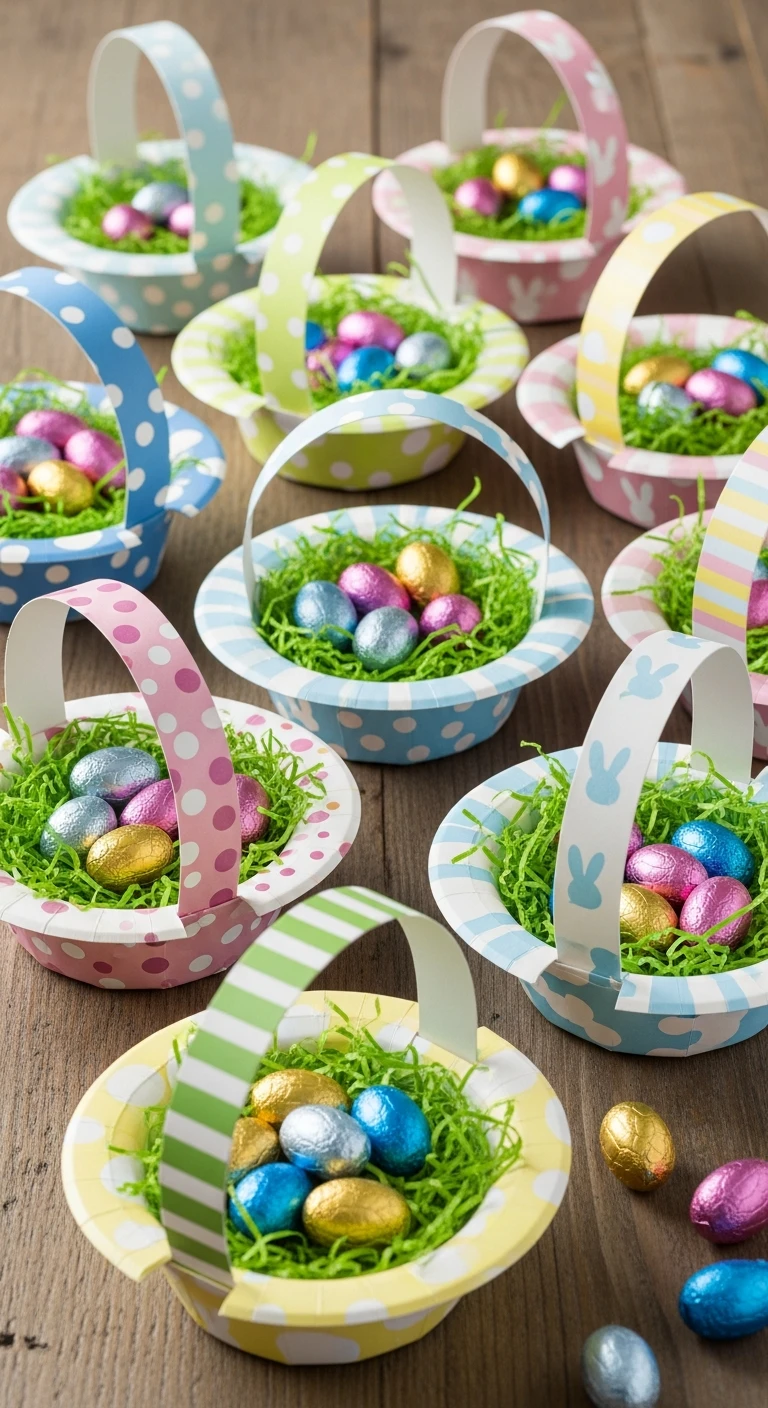
Transform simple paper plates into functional and adorable miniature Easter baskets. Start with two standard paper plates. Cut one plate in half; one half will serve as the handle, and the other half can be discarded. Take the full plate and cut a small slit about an inch inward all around the circumference, creating tabs. Overlap these tabs and staple them together to form a shallow bowl shape. Once the base is secured, staple the half-plate handle across the top arch of the basket structure. Children can then decorate the entire basket using markers, paint, glitter, or stickers. For a festive touch, glue green shredded paper or tissue paper inside to mimic grass. These baskets are perfect for collecting small treats or eggs during an indoor hunt and are a great way to recycle common party supplies into personalized holiday decor, emphasizing scissor skills and construction techniques.
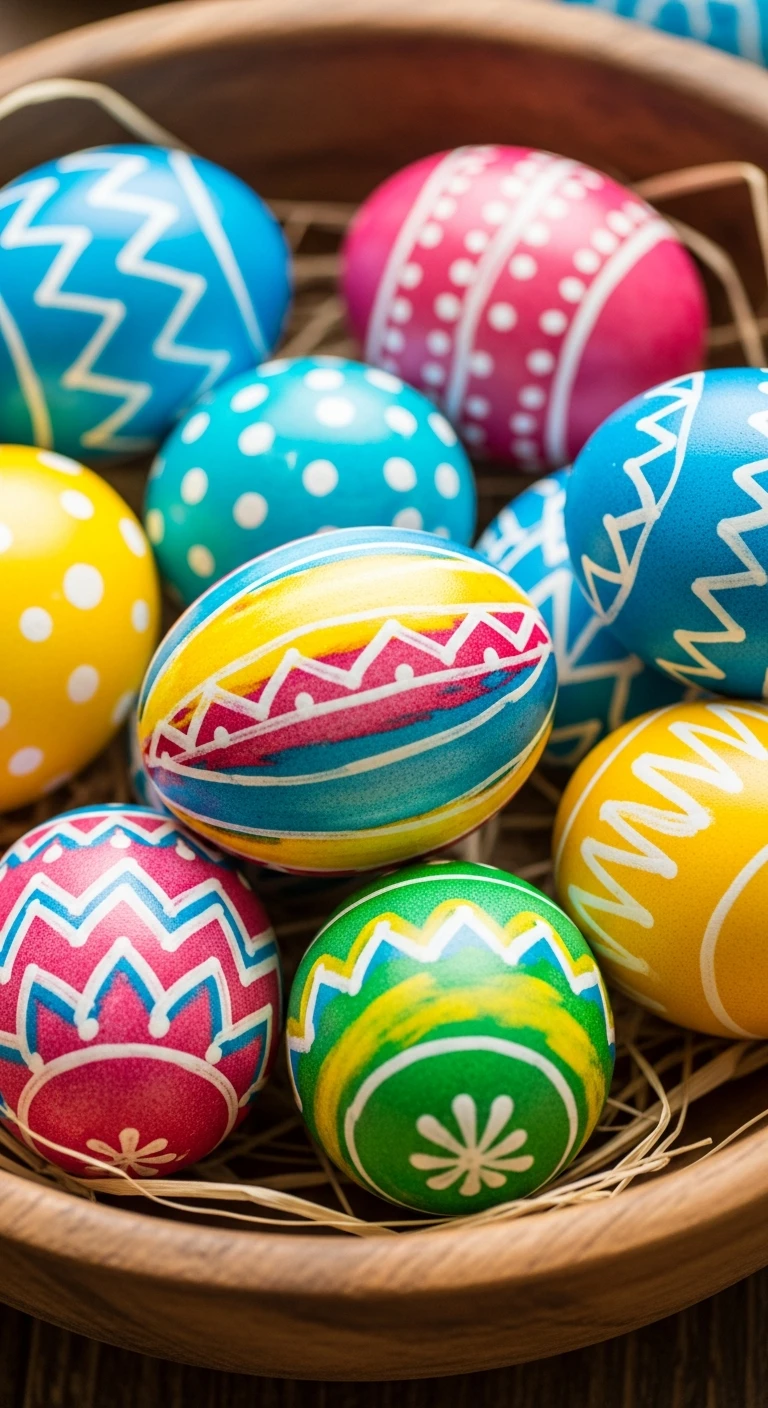
3. Q-Tip Painted Easter Eggs
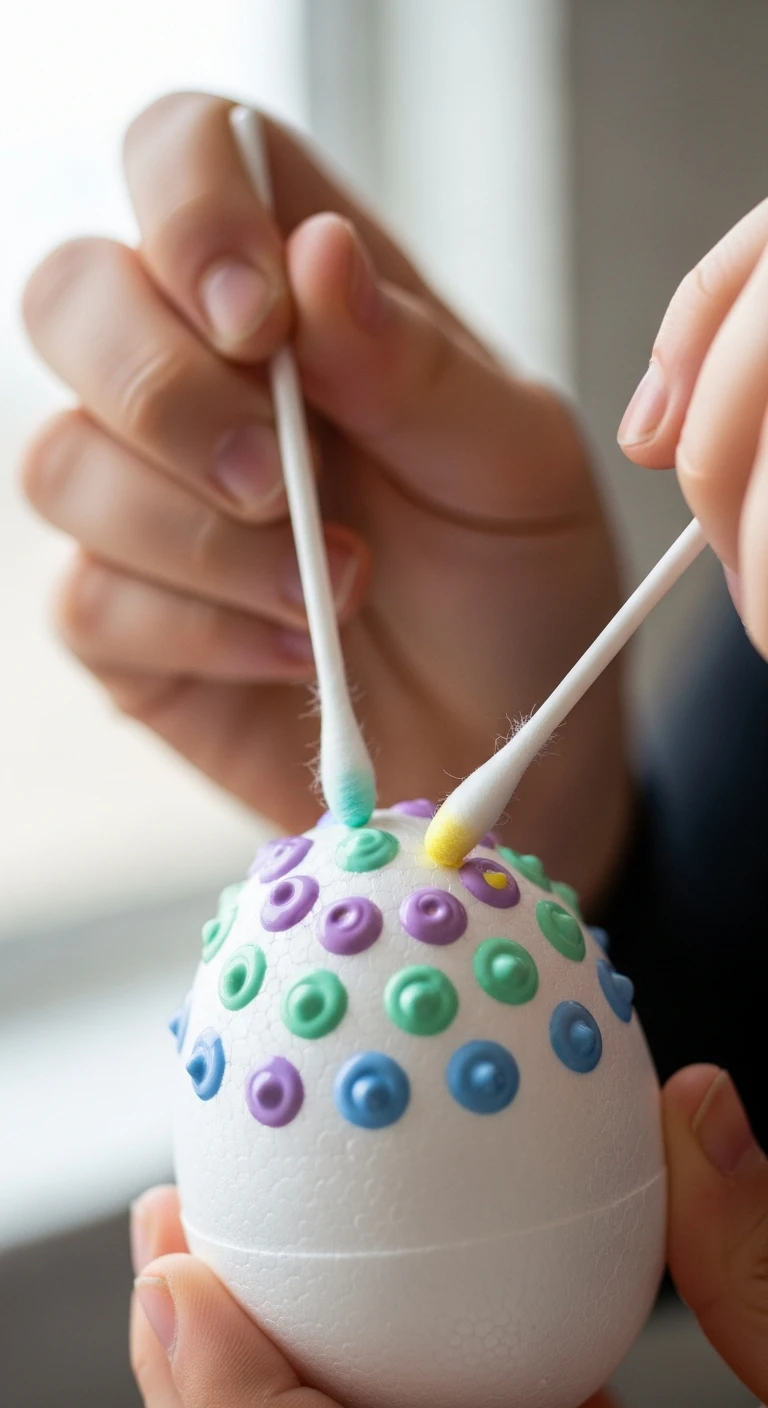
This craft offers a unique, textured alternative to traditional egg painting, perfect for developing precision and control. Instead of using brushes, children dip Q-tips (cotton swabs) into various colors of acrylic or tempera paint and dot them onto hard-boiled or craft foam eggs. The small, uniform dots create a beautiful, pointillism effect, allowing for intricate patterns and color blending without the mess of runny paint. Encourage kids to experiment with different patterns, such as spirals, stripes, or geometric shapes, by using multiple Q-tips bundled together or single ones for fine detail work. This technique is particularly calming and meditative, focusing the child on pattern repetition. Once dry, the dotted eggs have a lovely texture and vibrant appearance, making them stand out from standard dyed eggs. This is also an excellent activity for practicing color theory and concentration.
4. Fingerprint Chick Cards
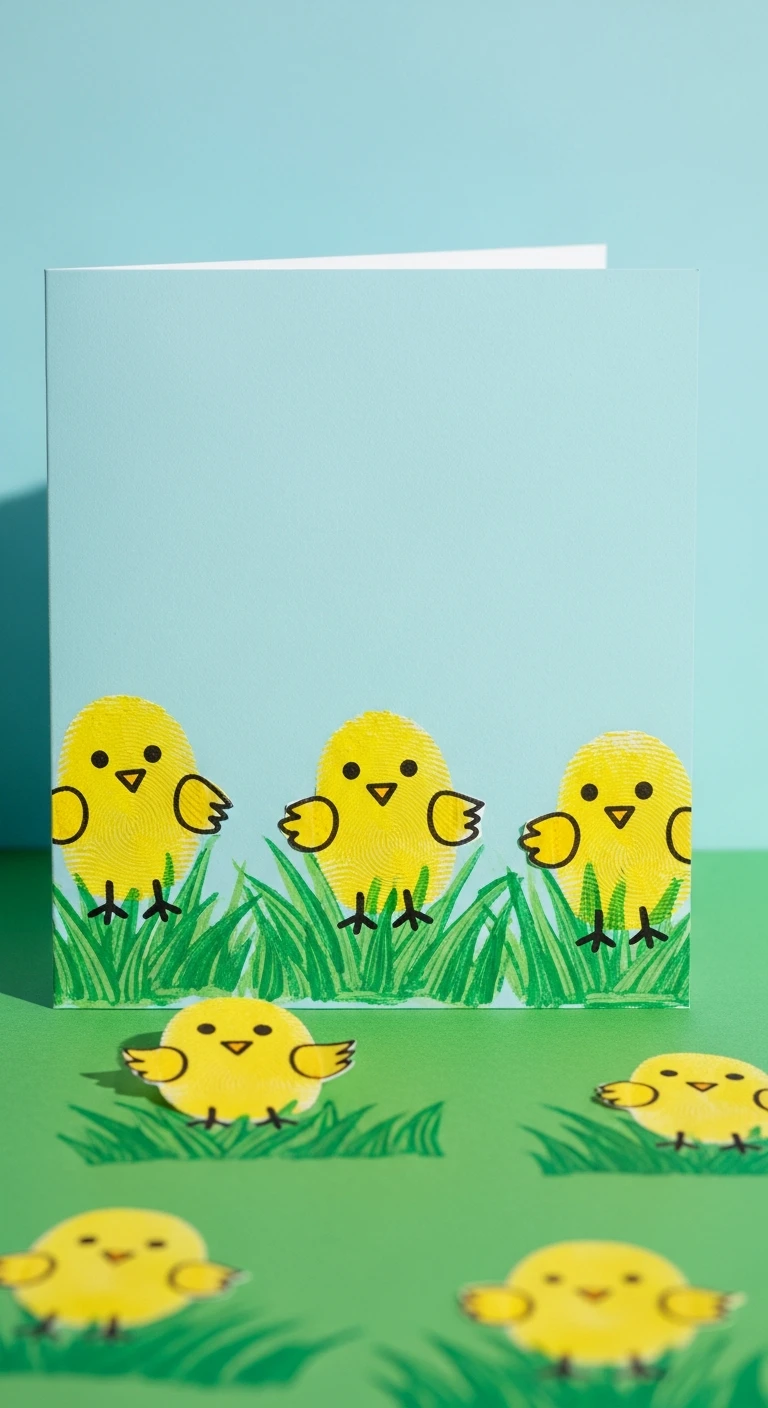
Fingerprint crafts are quick, easy, and capture a precious moment in time, making these chick cards perfect keepsakes. Use yellow washable paint and instruct the child to press their finger onto the paint pad and then firmly onto cardstock to create the body of the chick. Once the yellow paint is dry, use a fine-tipped black marker to add two small dots for eyes, and an orange marker to draw a tiny triangle for the beak and two small lines for the feet. You can create multiple chicks on one card, arranging them in a little ‘flock’ or having them peek out from behind painted green grass. This simple project is ideal for toddlers and preschoolers, requiring minimal supplies and cleanup, while producing adorable, personalized greetings to send to family members during the holiday season. The slight variation in each fingerprint ensures that every chick has its own unique character and charm.
5. Crayon Resist Dyeing
Crayon resist is a classic art technique that yields surprisingly sophisticated results on Easter eggs. Before dyeing, children use white or light-colored crayons to draw patterns, letters, or designs onto the shell of a hard-boiled egg. Because wax resists water, the areas covered by the crayon will not absorb the dye. Encourage kids to press firmly with the crayon to ensure a thick layer of wax. Once the designs are complete, submerge the eggs into a standard cold liquid egg dye bath. When the eggs are removed and dried, the crayon design will magically appear in white or the original shell color against the vibrant dyed background. This technique works best with darker, saturated dyes which provide a strong contrast, making the hidden designs pop clearly. It’s a fun way to introduce the concept of resistance and masking in art.
6. Salt Dough Egg Ornaments
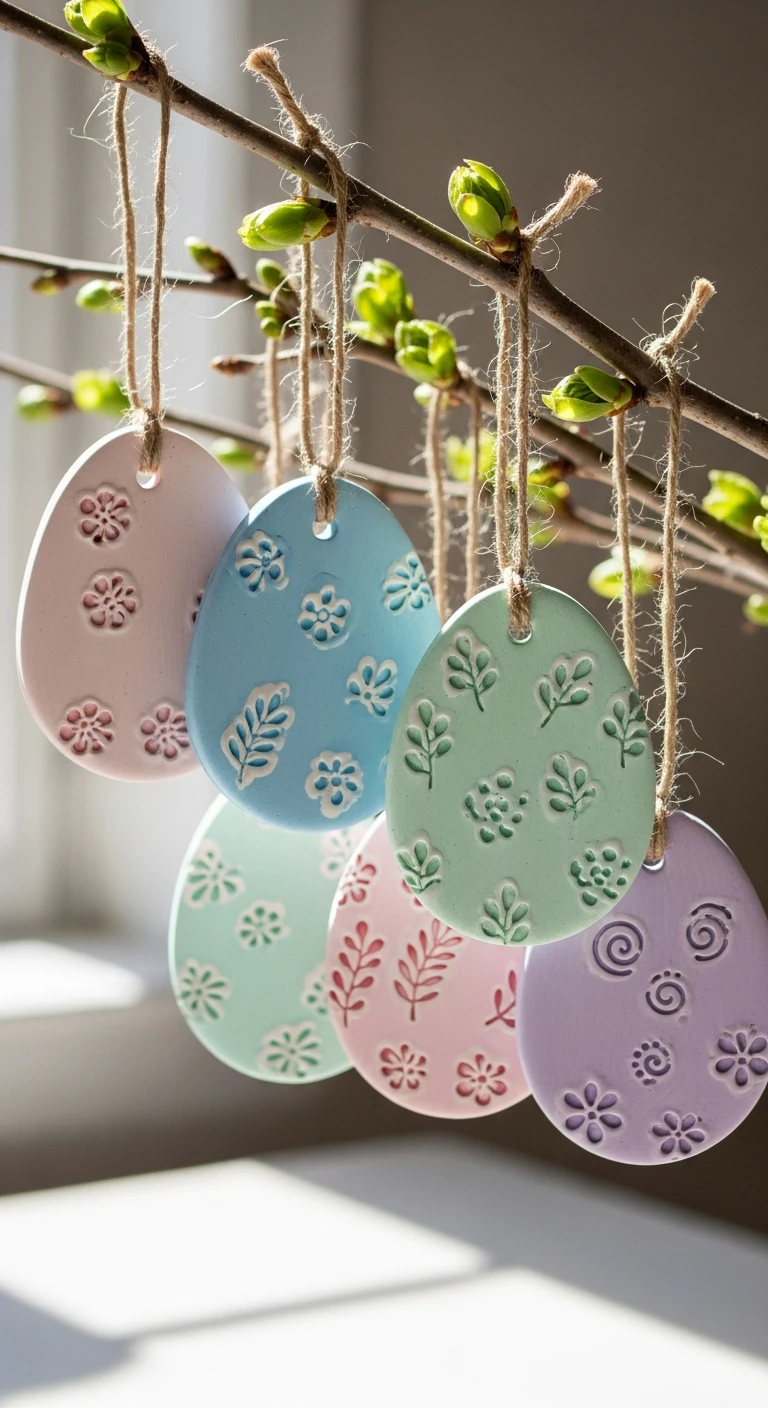
Salt dough is a versatile, inexpensive material perfect for creating permanent Easter keepsakes. Prepare a simple mixture of flour, salt, and water, kneading it until smooth. Roll the dough flat and use egg-shaped cookie cutters or simply cut out oval shapes with a knife (adult assistance required). Before baking, use a straw or skewer to poke a small hole near the top of each dough egg for hanging. Once baked and cooled according to the dough recipe, the ornaments can be painted with acrylic paints in spring colors and sealed with a clear varnish for protection. Children can decorate them with glitter, buttons, or even press small patterns into the dough before baking. These durable ornaments are great for decorating an Easter tree or serving as unique gift tags for baskets, lasting for years to come.
7. Pipe Cleaner Carrot Garland
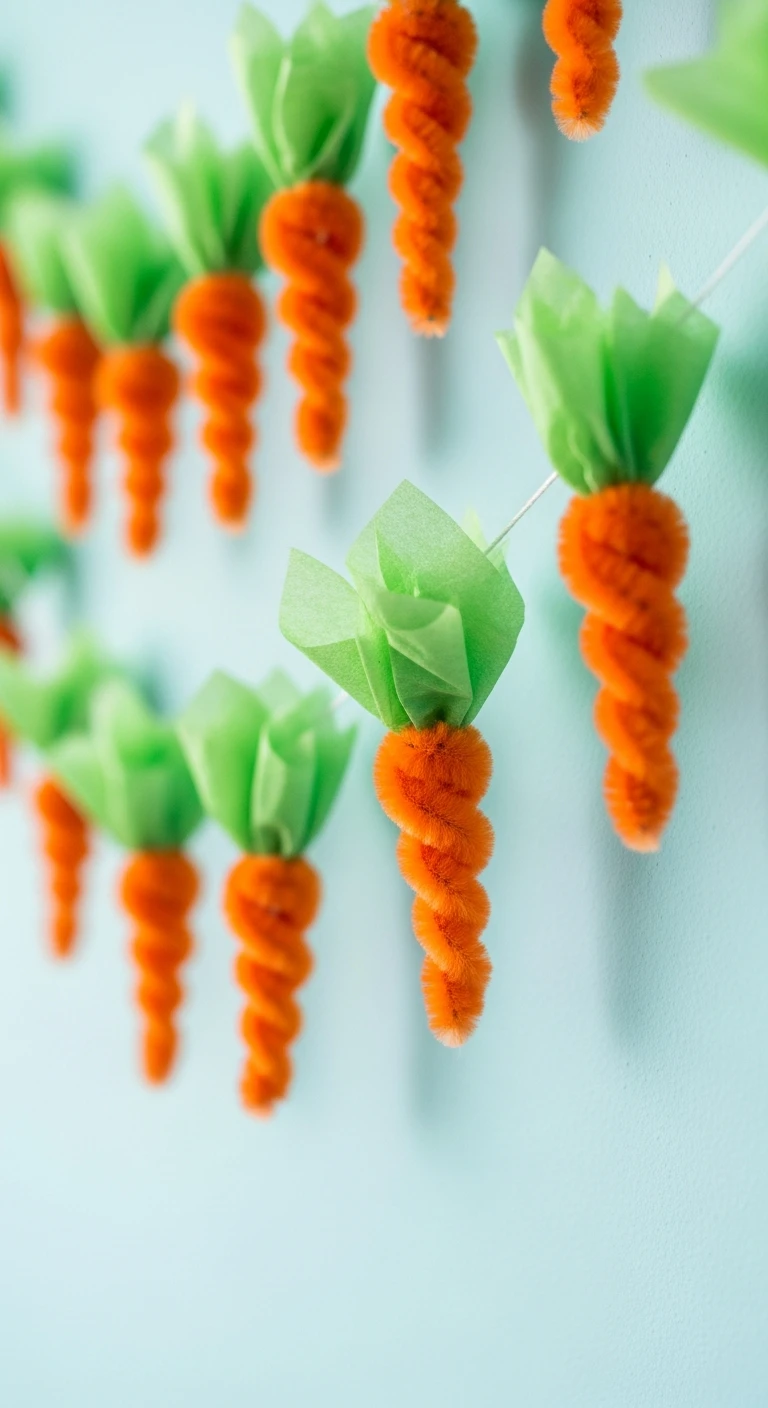
This simple, repetitive craft is excellent for practicing fine motor skills and creating festive, three-dimensional decorations. Gather orange pipe cleaners and small scraps of green tissue paper or felt. To form a carrot, take three orange pipe cleaners and twist them together at the top. Fan out the bottom ends slightly to create a carrot shape, then gently bend and twist them irregularly to give the carrot texture. Cut small strips of green tissue paper or fuzzy green pipe cleaners and twist them onto the top joint to represent the leafy greens. Once several carrots are made, they can be strung together using a length of yarn or thread to create a cheerful garland. This garland is lightweight and perfect for decorating a mantle, doorway, or children’s bedroom, adding a whimsical touch of spring harvest to your Easter decor.
8. Toilet Roll Tube Bunnies
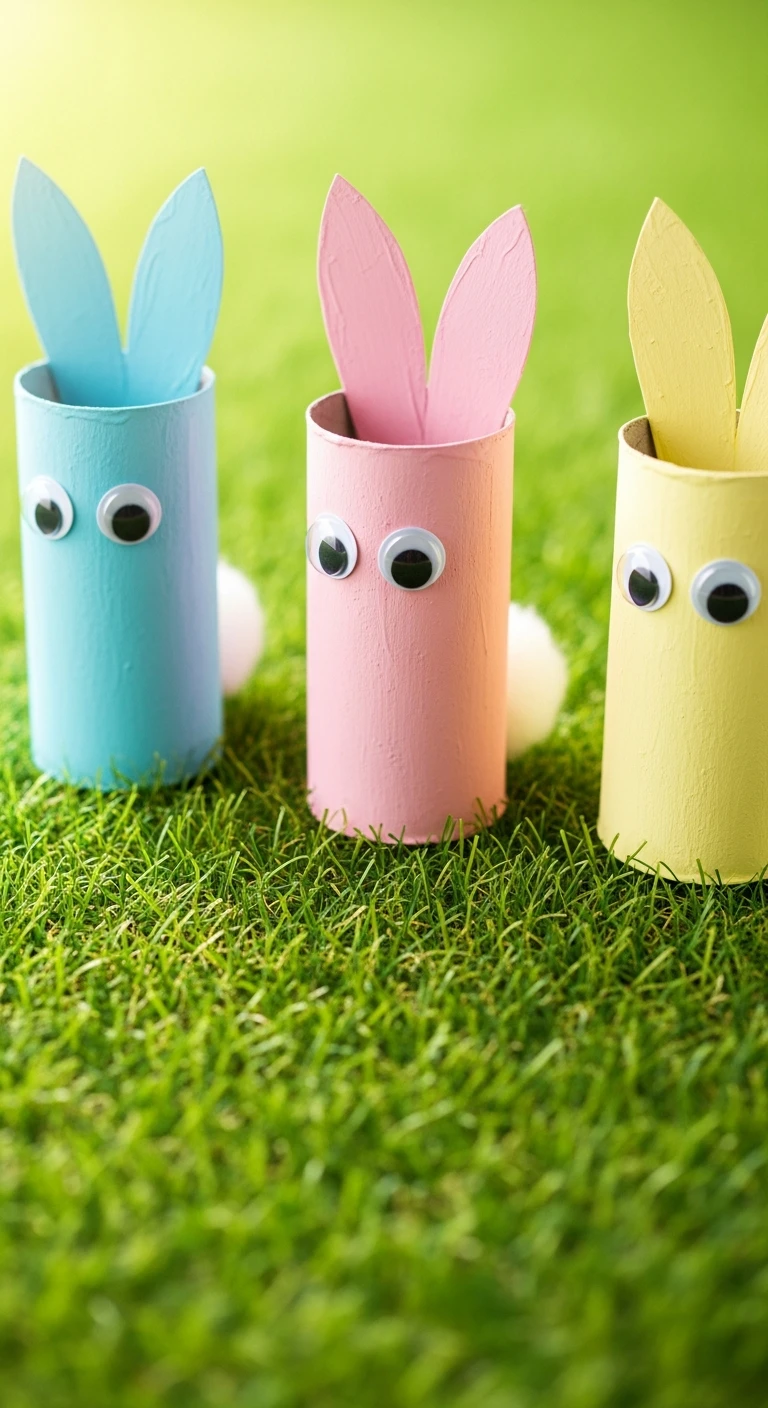
Recycle everyday household items into adorable Easter characters using cardboard toilet or paper towel tubes. Start by painting the cardboard tube white, pink, or light brown. Once dry, cut ear shapes from matching colored construction paper or felt and glue them to the inside top rim of the tube. Use googly eyes and a small marker to draw a nose and whiskers. A small cotton ball glued to the back serves as the fluffy tail. For extra detail, children can draw clothing or patterns onto the bunny’s body. These stand-up bunnies are perfect for imaginative play, can hold small treats, or serve as simple place card holders for the Easter meal, offering a sustainable and fun crafting activity that encourages resourcefulness and imaginative character design.
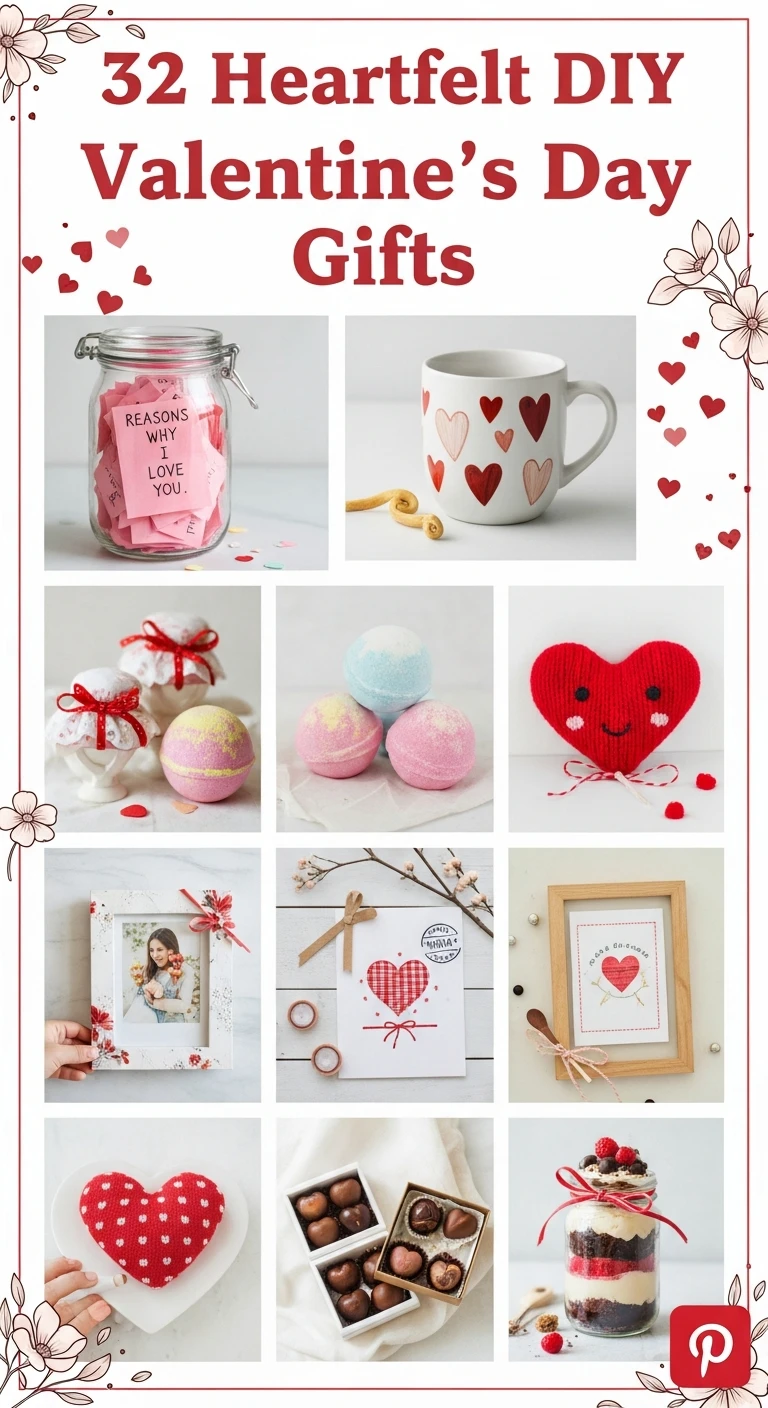
Read Also:32 Heartfelt DIY Valentine’s Day Gifts for presents
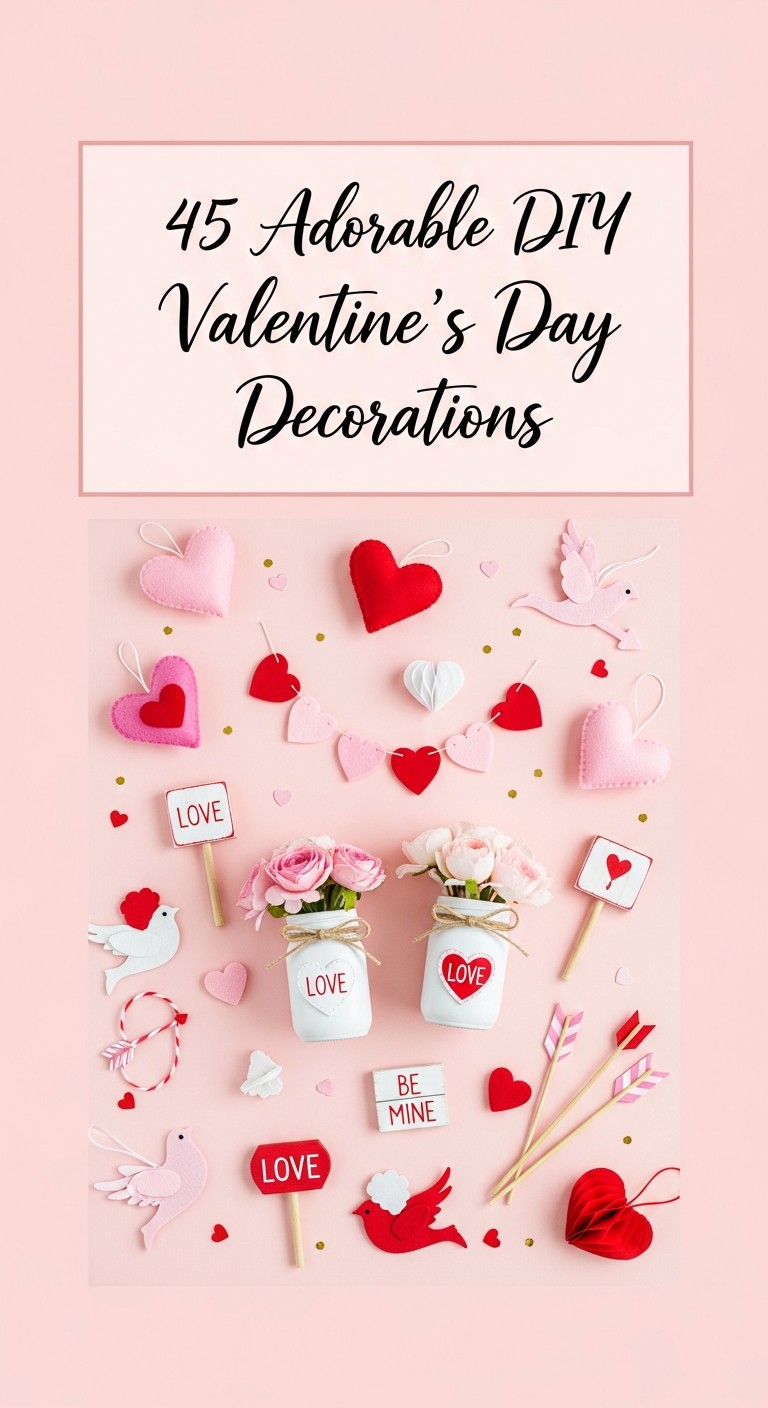
45 Adorable DIY Valentine’s Day Decorations
9. Handprint Lily Art
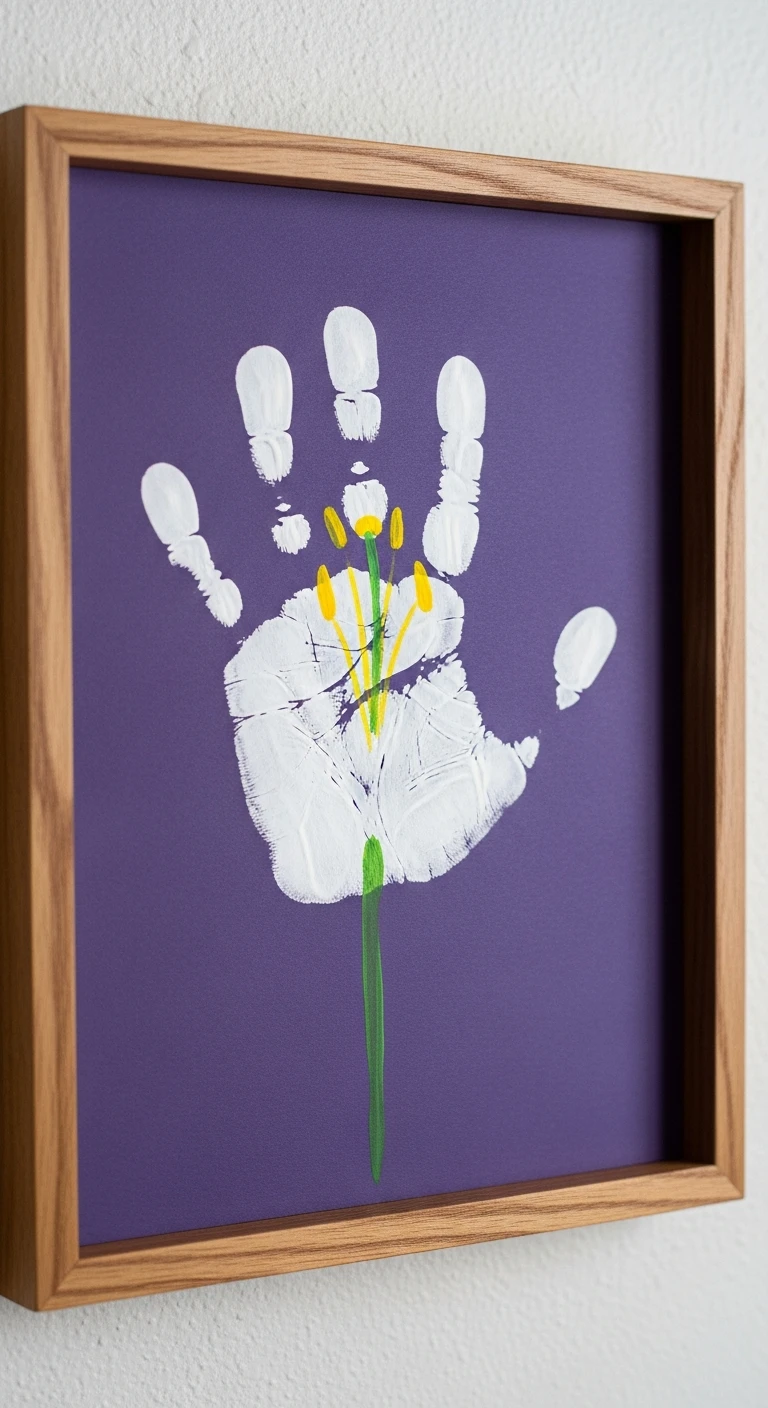
Capture your child’s handprint in a beautiful, symbolic Easter lily piece. Use white paint and help the child press their hand onto dark construction paper, ensuring the fingers are slightly spread apart. The fingers represent the petals of the lily. Once dry, use a fine paintbrush and yellow paint to add the stamen (the center filaments) to the base of the ‘petals.’ Finish the piece by painting a dark green stem and leaf coming up from the bottom of the page. This project creates a lovely, personalized piece of art that symbolizes the spring renewal often associated with Easter, offering a meaningful keepsake that is visually striking due to the contrast between the white handprint and the dark background. It’s an ideal craft for younger children who enjoy the sensation of paint.
10. Coffee Filter Butterflies
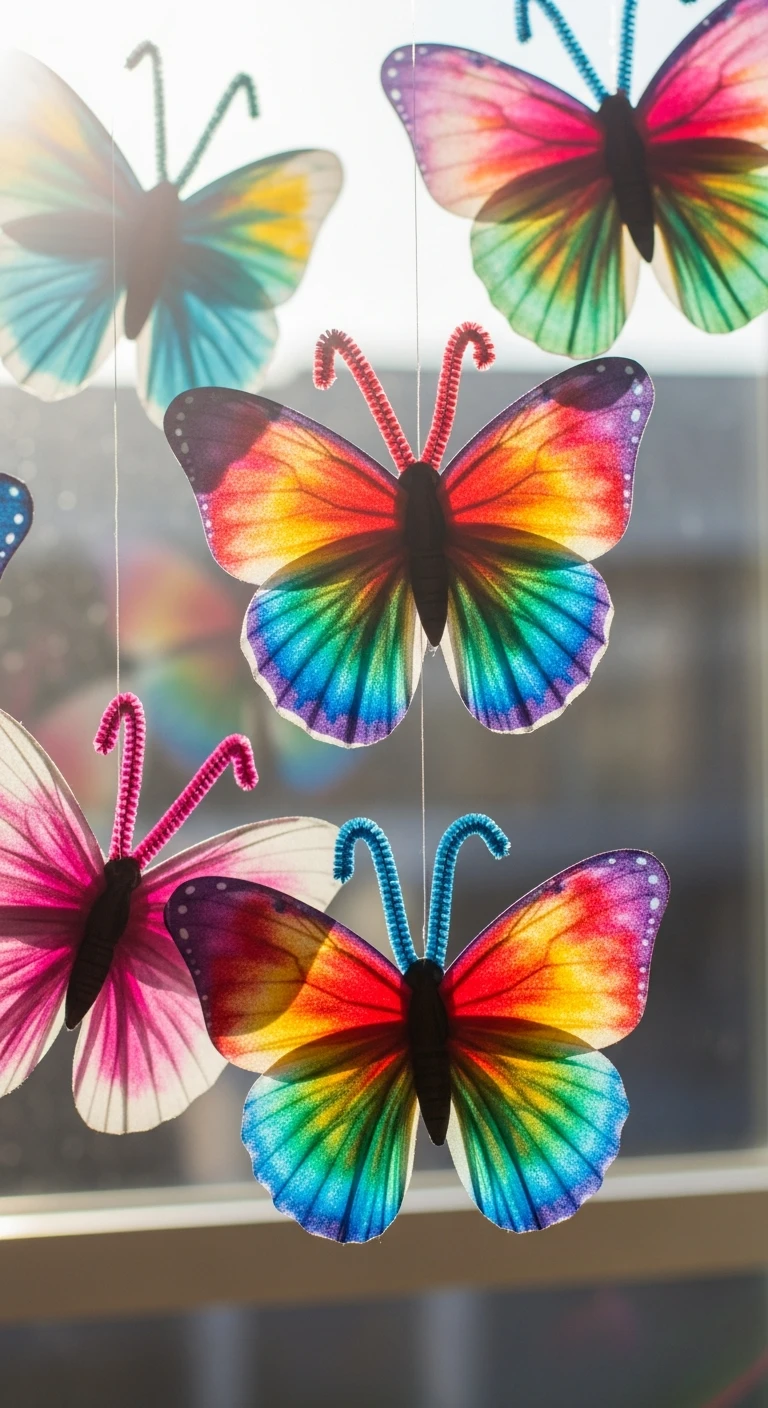
These vibrant, tie-dye style butterflies are a classic craft that showcases beautiful color blending. Flatten a white coffee filter and use washable markers to color it heavily with various bright colors, ensuring the colors touch each other. Once colored, use an eyedropper or spray bottle to lightly mist the filter with water; watch as the colors bleed and blend together, creating a watercolor effect. Let the filter dry completely. Once dry, pinch the filter in the middle and secure it with a pipe cleaner, leaving the ends of the pipe cleaner sticking up to form antennae. The resulting butterflies are airy and colorful, perfect for hanging near a window to catch the light, demonstrating simple capillary action and color mixing in an engaging way.
11. Pom-Pom Sheep Decorations

Create fluffy, adorable sheep that can stand alone or be incorporated into a spring diorama. Start by making or purchasing large white pom-poms (or use cotton balls glued onto a cardboard oval). Cut out small black or grey felt shapes for the head and four thin legs. Glue the felt pieces onto the pom-pom body. Use tiny googly eyes for added personality. This craft involves simple assembly and texture exploration, appealing to children who love tactile materials. The pom-pom body provides a wonderful sensory experience. If time allows, children can learn how to make their own pom-poms using yarn and a fork or cardboard template, adding an extra layer of skill development to the project, resulting in a charming, woolly friend perfect for Easter display.
12. Watercolor Cross Art

For a craft focusing on the religious aspect of Easter, watercolor cross art provides a beautiful and contemplative activity. Cut a simple cross shape out of masking tape or painter’s tape and firmly adhere it to a piece of thick watercolor paper. Children then use liquid watercolors or traditional watercolor pans to paint freely all over the paper, using a blend of bright, spring colors. Once the paint is completely dry, slowly and carefully peel off the masking tape cross. The area underneath will remain white, creating a striking negative space image of the cross against the vibrant painted background. This resist technique is both simple and deeply satisfying, offering a beautiful, abstract piece of art suitable for framing or gifting to grandparents, emphasizing clean lines and color contrast.
13. Popsicle Stick Chick Puppets

Popsicle sticks are an excellent base for creating simple, sturdy puppets or figures. Glue two or three sticks together side-by-side to create a wider surface. Paint the surface bright yellow and let it dry. Once dry, glue on googly eyes, a small orange felt triangle for the beak, and perhaps some yellow feathers along the top edge for texture. Attach a single, clean popsicle stick perpendicular to the bottom back of the figure to serve as the handle. These cheerful chick puppets are fantastic for storytelling and imaginative play. Children can create an entire set of Easter characters—bunnies, lambs, and chicks—to put on a spring puppet show, encouraging verbal development and creative narrative skills in a fun, hands-on way.
14. Yarn Wrapped Eggs

This craft is highly engaging for older children who enjoy repetitive, focused tasks, resulting in beautiful, textured eggs. Start with plastic or styrofoam craft eggs. Apply a line of craft glue (like Mod Podge or tacky glue) to a small section of the egg. Press the end of a length of yarn (use thick yarn for faster coverage) onto the glue and begin tightly wrapping the yarn around the egg, applying glue in small sections as you go. Encourage children to use different colors of yarn, starting and stopping colors neatly to create stripes or color blocks. The final result is a wonderfully tactile egg that is unique and durable, perfect for centerpiece arrangements or mantel displays, offering a sophisticated look compared to traditional dyed eggs. The process requires patience and careful coordination.
15. Footprint Bunny Canvas

Similar to the handprint craft, a footprint bunny captures the size of a child’s foot in a memorable piece of art. Use white or light gray washable paint and carefully press the child’s foot onto a canvas or heavy cardstock. The heel of the foot forms the head of the bunny, and the arch forms the body. Once the print is dry, use a paintbrush to add long, floppy ears above the heel area. A small pink pom-pom can be glued onto the heel for a nose, and a larger white pom-pom added to the bottom of the print for the tail. This project is particularly sweet for babies and toddlers, resulting in a large, impactful piece of nursery or holiday decor, serving as a cherished record of their tiny size during that particular spring season.
16. Jelly Bean Mosaic Pictures
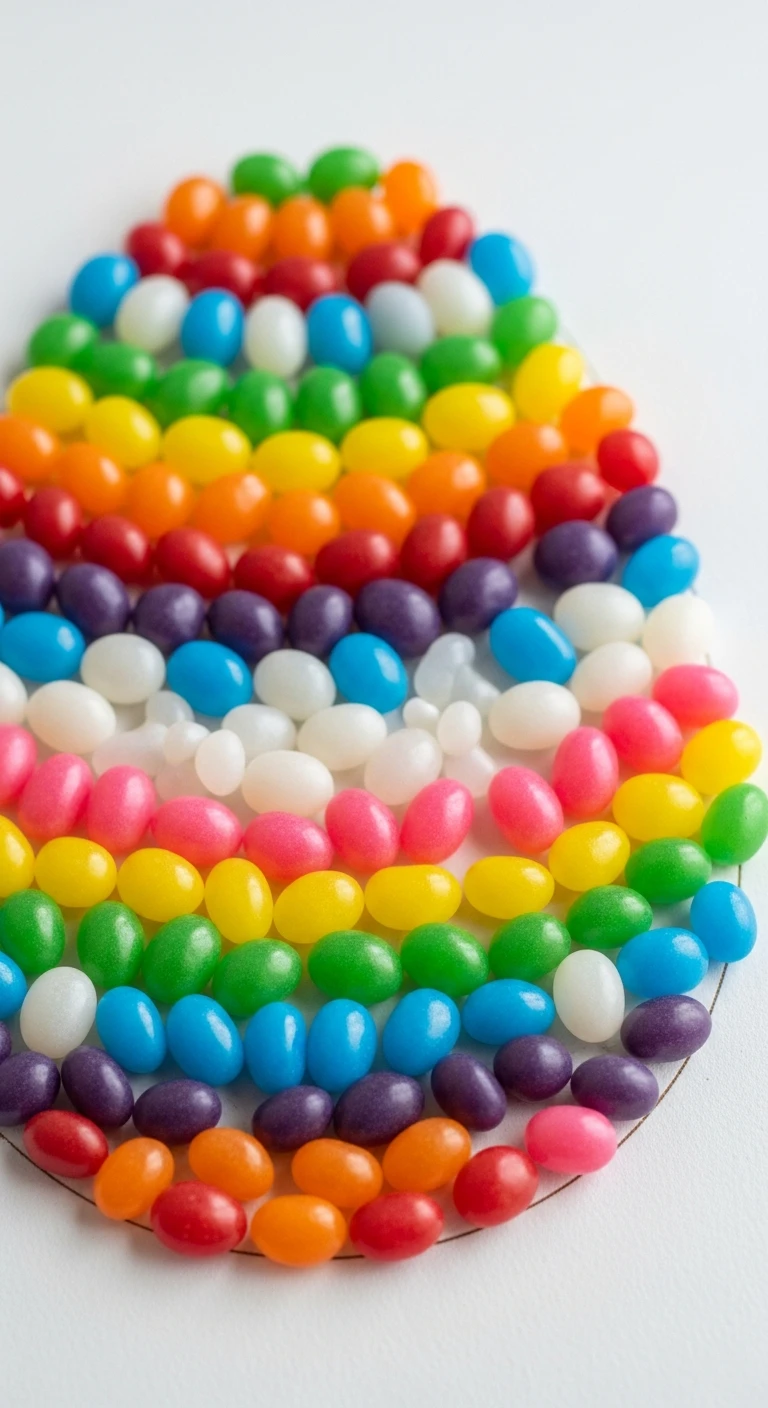
Turn colorful jelly beans into edible or decorative mosaic art. Draw a simple Easter shape (like an egg, a chick, or a flower) onto thick cardstock. Using strong craft glue or icing (if planning to consume the art immediately), children carefully place the jelly beans onto the drawing, fitting them together tightly to fill the space completely. Using different colors of jelly beans allows for impressive shading and detail work, much like a traditional mosaic. If the mosaic is intended to last, use strong glue and shellac the finished product after the glue dries to deter pests. This activity is fantastic for practicing pattern recognition, spatial reasoning, and detailed placement, though it requires significant self-control not to eat the supplies before the art is finished!
17. Tissue Paper Suncatchers

Suncatchers are a beautiful way to bring light and color into the home, and the use of tissue paper makes them accessible for all ages. Cut out two identical Easter shapes (like an egg or a bunny) from black construction paper, creating a frame. Lay one frame down and cover the inside area with small, colorful squares of tissue paper, overlapping them slightly. Place the second frame exactly on top and laminate the entire piece using clear contact paper, sealing the tissue paper between the two layers. Punch a small hole at the top and thread a ribbon through for hanging. When placed in a sunny window, the overlapping tissue paper creates a stained-glass effect, casting beautiful, colored light into the room, making it a truly rewarding and visually stunning craft.
18. Egg Carton Flower Bouquets

Repurpose cardboard egg cartons into charming spring flowers. Cut individual cups from the egg carton, trimming the edges to resemble petals. Paint the cups in bright, cheerful colors like pinks, yellows, and blues. Once dry, pierce a small hole through the center of each cup and thread a green pipe cleaner through, securing it underneath to act as the stem. Children can add a small pom-pom or button to the center of the flower for the pistil. Gather a collection of these egg carton flowers to create an everlasting Easter bouquet, perfect for gifting or decorating the dining table. This activity promotes recycling and creative transformation of waste materials into beautiful, three-dimensional art.
19. Masking Tape Bunny Silhouettes

This is an easy variation of the resist technique that results in a sharp, graphic image. Draw or print a simple bunny silhouette and cut it out of paper. Trace the shape onto a piece of cardstock and use masking tape to cover the entire area inside the traced lines. Ensure the tape edges are firmly pressed down. Children then paint the entire paper surface surrounding the tape with bright tempera or acrylic paints. Once the paint is completely dry, slowly peel off the masking tape to reveal a perfect, unpainted bunny silhouette against a colorful, textured background. This technique is excellent for creating modern, minimalist Easter posters or cards, highlighting the contrast between the clean lines of the silhouette and the free-form painting surrounding it.
20. Shaving Cream Marbled Paper

Marbling paper using shaving cream creates stunning, unique patterns perfect for wrapping small gifts or cutting into decorative Easter shapes. Spread a thick layer of shaving cream in a shallow tray. Drop various colors of liquid food coloring or watered-down paint onto the cream. Use a skewer or toothpick to gently swirl the colors, creating marbled patterns without mixing them completely. Lay a piece of white cardstock or paper gently on top of the cream, press lightly, and then peel it off. Use a ruler or cardboard scraper to scrape off the excess shaving cream, revealing the beautiful marbled design underneath. This sensory activity is messy but rewarding, resulting in truly unique papers that can be cut into eggs, bunnies, or flowers.
21. Painted Rock Garden Markers
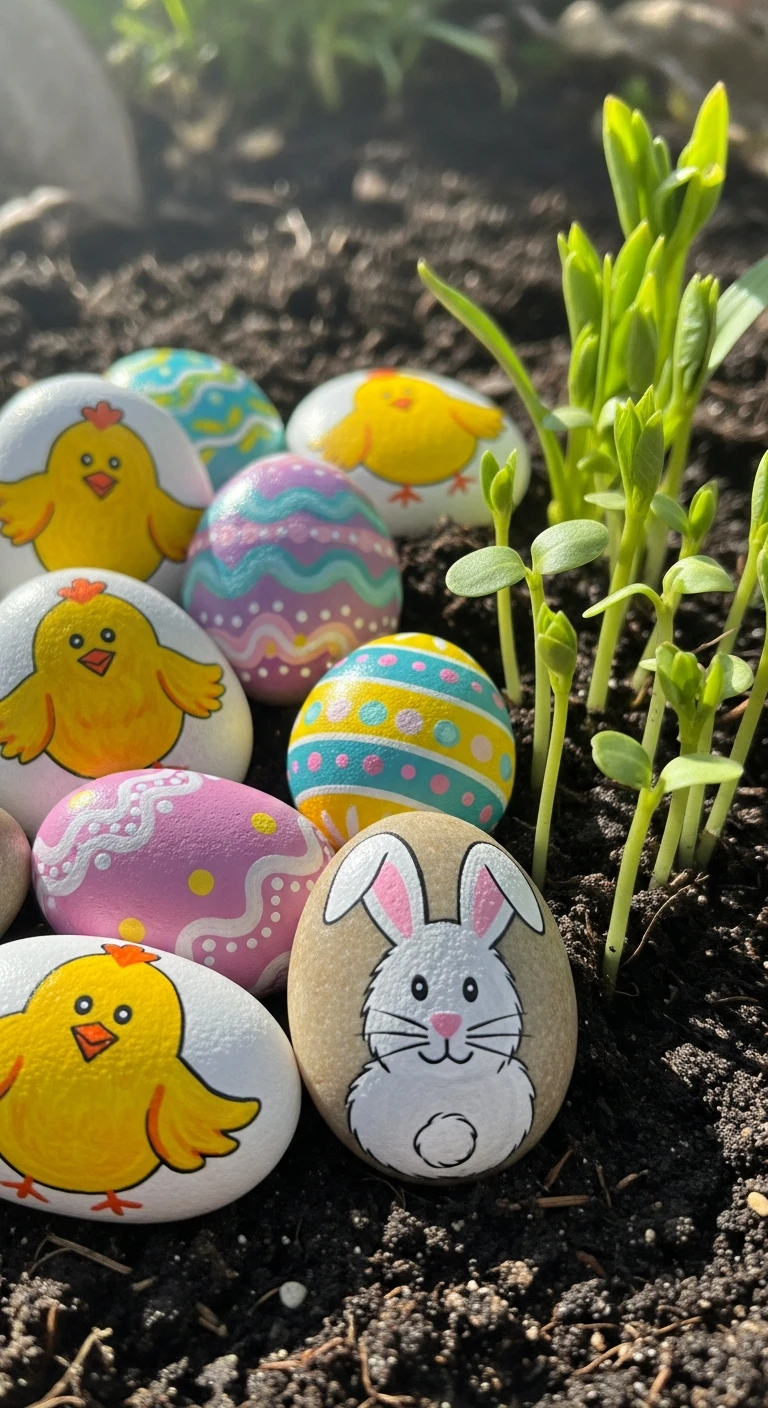
As spring approaches and gardening begins, painted rocks are a durable and fun craft. Collect smooth, flat rocks and clean them thoroughly. Use acrylic paints to decorate them with Easter themes: bunny faces, colorful eggs, or spring flowers. Once the paint is dry, seal the rocks with an outdoor-safe varnish or sealant to protect them from the elements. These rocks can be used as decorative garden markers, placed around flower beds, or simply hidden in the yard for a fun, ongoing Easter scavenger hunt. This craft encourages observation of nature and provides a lasting, functional piece of art that brightens up the outdoor space, connecting the holiday theme with the season of growth.
22. Felt Easter Finger Puppets
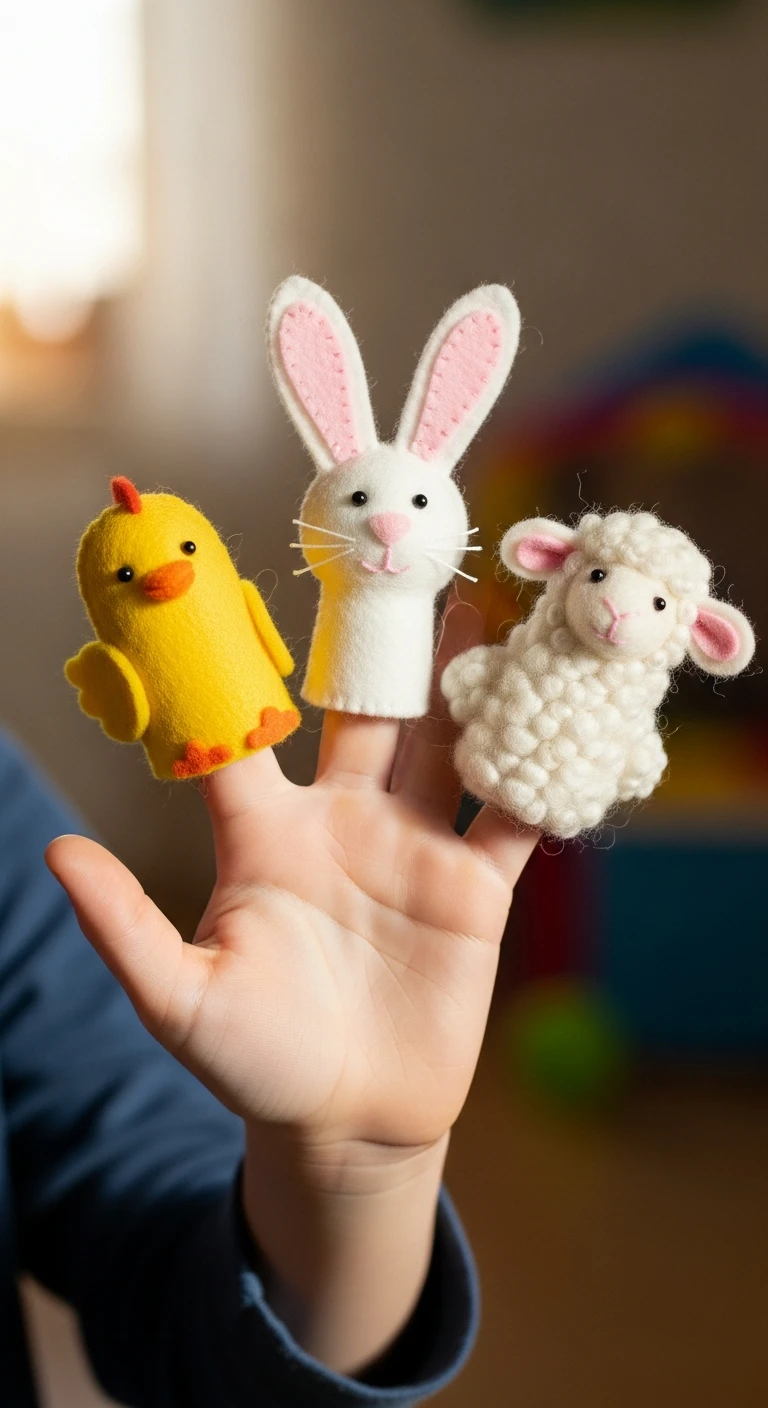
Felt is an easy material for children to work with as it doesn’t fray and can be cut into intricate shapes. Cut small, tube-like shapes of felt that fit snugly over a child’s finger. Then, cut out small details—ears, wings, beaks, and whiskers—from different colored felt scraps. Use craft glue to attach these details onto the finger tube to create various Easter characters like bunnies, chicks, and lambs. This simple sewing-free activity is perfect for developing small-scale assembly skills and results in delightful toys that encourage imaginative play and storytelling. The puppets are durable and can be stored easily for use in future Easter seasons.
23. Cereal Box Easter Treat Holders
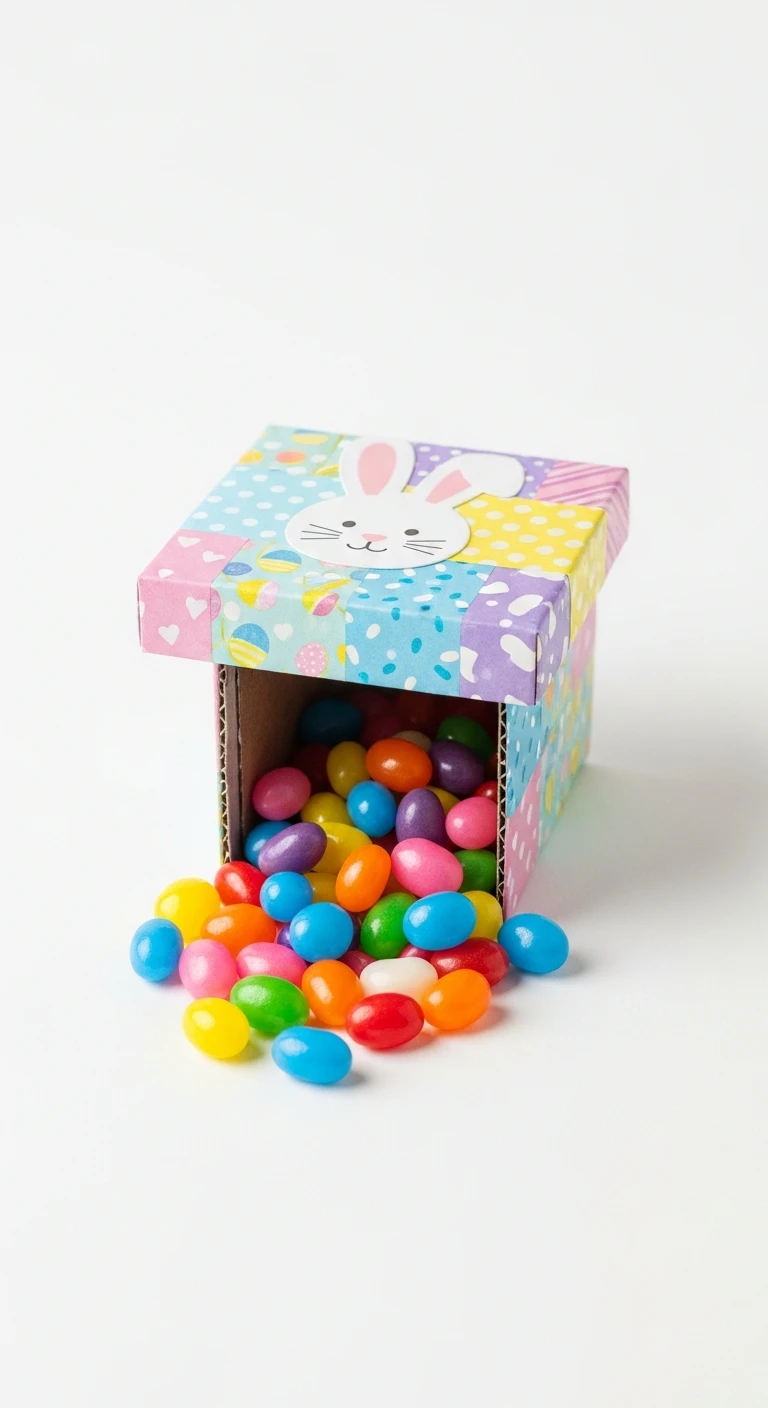
Repurpose old cereal boxes into custom treat holders for Easter gifts. Start by dismantling a cereal box and cutting out large rectangular sections. Fold the cardboard into small cube or prism shapes, securing the edges with strong tape or glue to create little boxes. Children can then decorate the outside of these boxes completely, covering them in wrapping paper, paint, or construction paper cutouts of Easter motifs. Once decorated, they can be filled with shredded paper and small candies or treats. This project teaches basic geometry and construction skills while offering a personalized, sustainable alternative to store-bought treat bags, making the presentation of holiday treats extra special.
24. Nature Walk Stick Crosses

Combine an outdoor activity with crafting by creating decorative stick crosses. Take children on a nature walk to collect small, straight sticks. Once back inside, select two sticks of varying lengths—one long for the vertical beam and one shorter for the horizontal beam. Arrange them in a cross shape and securely bind them together at the intersection using twine, yarn, or colorful embroidery floss. Children can then decorate the cross by weaving small flowers, moss, or colored yarn around the sticks. This craft connects the natural world with the religious significance of the holiday, resulting in a rustic, beautiful decoration that can be hung on a wall or placed in a vase as part of a centerpiece.
25. Beaded Pipe Cleaner Rings
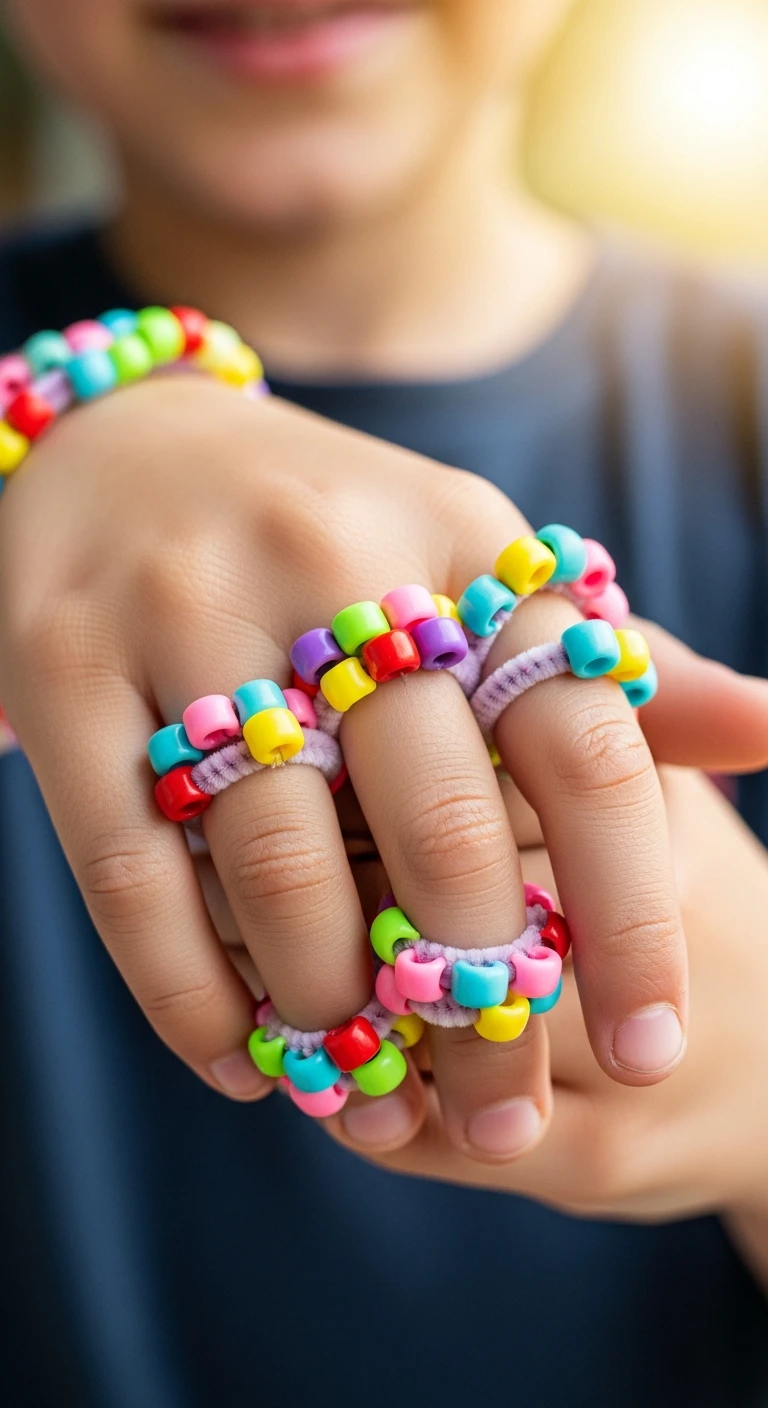
Creating simple jewelry is always a hit, and pipe cleaner rings are easy and require no complicated tools. Take a single pipe cleaner and thread small pony beads or seed beads onto it. Encourage children to choose beads in spring colors—pinks, greens, yellows, and whites—and create repeating patterns. Once the pipe cleaner is mostly covered in beads, wrap the ends together to form a small loop that fits comfortably around a finger. The ends can be tucked in or twisted to secure the beads. These rings are quick to make, perfect for party favors, or just for fun dress-up play, promoting pattern sequencing and fine motor coordination in a creative jewelry-making context.
26. Decoupage Plastic Eggs

Decoupage is an elegant technique that allows children to create sophisticated, patterned eggs using paper napkins or tissue paper. Start with plastic or wooden craft eggs. Cut small shapes or strips from patterned paper napkins (separating the decorative layer from the backing layers). Apply a layer of decoupage glue (like Mod Podge) to a section of the egg, carefully lay the paper down, and then brush another layer of glue over the top, smoothing out any wrinkles. Repeat until the entire egg is covered. Once dry, the eggs have a lovely, sealed finish and look much more refined than simple painted eggs, making them excellent additions to permanent Easter displays and teaching a useful crafting technique.
27. DIY Bunny Ear Headbands

No Easter celebration is complete without a pair of cute bunny ears! This craft is simple and results in a wearable accessory. Start with a plain plastic headband. Cut two long, narrow ear shapes from felt or stiff foam—one color for the main ear and a contrasting pink or white for the inner ear. Glue the inner ear onto the main ear. Use hot glue (adult required) or strong craft glue to attach the base of the ears to the top of the headband, bending the ears slightly forward for a playful look. Children can customize their headbands further by wrapping the band in ribbon or adding small flowers or bows at the base of the ears, creating a fun, personalized costume piece for the holiday.
Final Thoughts
These 27 simple craft ideas offer a fantastic starting point for a fun and creative Easter season. From transforming everyday items like toilet rolls and coffee filters into whimsical decorations to creating lasting keepsakes with salt dough and handprints, there is a project here for every age and skill level. Remember that the goal of crafting with children is not perfection, but the joy of the process and the time spent together. So gather your supplies, embrace the mess, and enjoy creating beautiful, personalized decorations that celebrate the vibrancy and renewal of spring. Happy crafting, and Happy Easter!