The Rustic Pallet Wood Planter

Reclaimed wood offers unbeatable texture for a farmhouse-style Easter aesthetic. Disassemble one standard pallet, cutting the slats into even lengths to form a simple rectangular box. Since this is a temporary Easter display, you don’t need excessive drainage; a simple plastic liner inside will protect the wood and keep moisture contained. Stain the exterior with a light gray wash or leave it naturally weathered. The key ingredient is layering: start with tulips and hydrangeas, then finish the look with tiny moss patches and several decorative faux bird nests tucked between the blooms for that rustic spring charm. This sturdy design can transition easily into summer planting.
Pastel Eggshell Mosaic Box

This craft is perfect for using leftover eggshells from your Easter baking! Wash and dry your shells thoroughly, then crush them into medium-sized fragments. Paint a simple wooden flower box base—white works best. Next, using craft glue, apply the crushed shells in stripes or abstract patterns, creating a textured mosaic effect. Once dry, seal the design with a clear protective spray. The finished result looks like a delicate, sparkling stone inlay. Fill this box with small pots of bright purple crocus or white pansies to avoid overwhelming the intricate shell detail. This design emphasizes texture over size, making it ideal for a windowsill.
Bunny Silhouette Stencil Box

For a playful, family-friendly design, use simple adhesive vinyl stencils. Start with a brightly painted box (think robin’s egg blue or soft mint green). Once dry, apply the stencil—a simple standing bunny, a collection of carrots, or even geometric eggs. Paint over the stencil using a contrasting white or darker gray paint. Peel off the stencil immediately for crisp edges. We love using this method for outdoor displays because it requires very little technical skill. For more engaging projects you can do with the kids, check out these ideas for 27 Easy Easter Crafts ideas for Kids. Fill this box with grasses and yellow daffodils, allowing the height of the flowers to mimic the texture of tall spring fields.
The Mossy Nest Box

Embrace woodland whimsy with this nature-focused design. Use a simple, shallow trough planter as your base. Line the entire exterior with sheet moss, securing it tightly with hot glue or floral wire. The moss creates an instant aged, earthy feel. Instead of traditional blooms, focus on incorporating natural textures like twisted grapevines, thin birch branches, and small, smooth stones. Plant vibrant purple hyacinths directly into the moss-lined planter, and strategically place several small decorative eggs on top of the soil, making it look like a collection of tiny forest treasures. This is a quick design, perfect for adding instant depth to a shaded patio.
Chalkboard Herb Garden Box

Combining utility with décor, this design is both stylish and practical. Paint the long face of a rectangular wooden box with black or deep gray chalkboard paint. Once cured, you can label the contents—Rosemary, Mint, Thyme—or simply write ‘Happy Easter.’ The dark paint provides a beautiful backdrop for pastel pots of lavender and pink primroses. This method is incredibly adaptable; if you’re short on time but still want maximum impact, this project offers the same kind of quick satisfaction you get from mastering Best Recipes for 13 Skillet Lasagna Weeknight Wins. The chalkboard allows you to change the message seasonally, maximizing its longevity.
Rain Boot Repurposed Display

This is a fun, whimsical take on the flower box concept. Instead of a traditional container, use three or four brightly colored, unused children’s rain boots (gumboots). Drill a drainage hole in the bottom of each boot. Arrange the boots inside a shallow, larger wooden tray or directly on a porch step. Fill each boot with soil and plant a different flower: one for brightly colored marigolds, one for trailing ivy, and another for pale pink petunias. This design adds height and a punch of color without requiring complex construction. It’s particularly effective near the entryway to welcome guests.
Shabby Chic Lace Trim Box

Achieve a delicate, vintage look by incorporating textile remnants. Start with a plain white or cream-colored window box. Using craft adhesive, wrap and secure wide, antique-style lace ribbon around the perimeter of the box. You can layer several different widths of lace for complexity. Once dry, lightly brush the lace and wood with a small amount of watered-down brown paint to give it a slightly aged appearance. This box demands soft, romantic blooms like cream roses and cascading sweet peas. The delicate aesthetic contrasts nicely with the richness found in comfort foods, such as preparing delicious, hearty dinners.
Carrot Patch Miniature Box

Create a cute, narrative scene perfect for an Easter centerpiece or small side table. Use a long, narrow metal trough. Fill the trough with potting mix and cover the surface with fine brown sand to mimic a dirt patch. Plant low-growing green leafy herbs (like parsley or small ferns) to represent carrot tops. The genius touch? Purchase small, brightly colored faux carrots and stick them halfway into the soil and sand mixture, making it look like a field of carrots ready for harvest. This design is focused purely on decoration and novelty, requiring minimal maintenance.
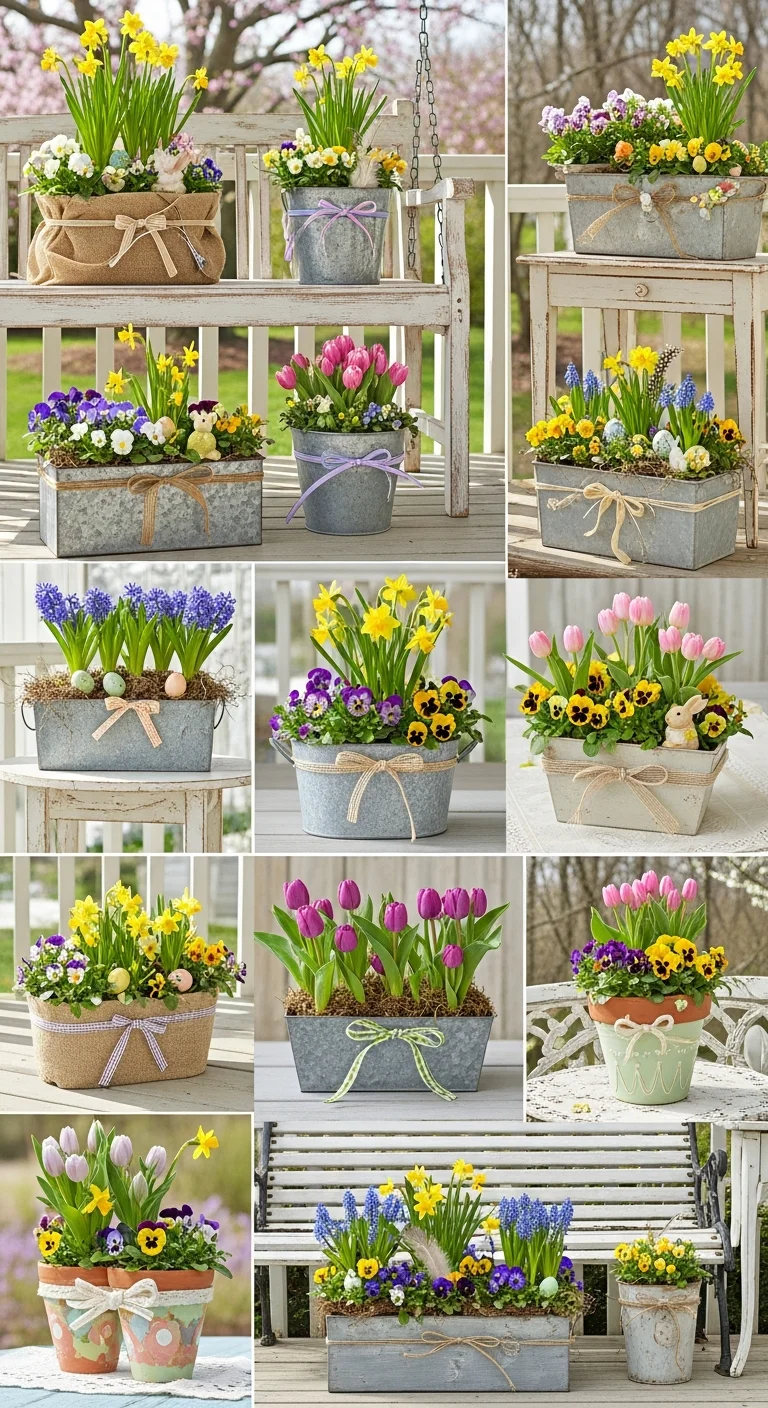
Galvanized Bucket Trio

Modern rustic design relies on clean lines and industrial materials. Instead of one long box, use three matching small galvanized metal buckets. These buckets already provide great drainage and require no painting. Line them up on a bench or windowsill. Plant each bucket with a single variety of flower in high contrast colors: deep violet violas in one, pure white paperwhites in the second, and bright green ornamental cabbage in the third. The repetition of the metal material provides structure, while the variation in color keeps the display lively and seasonal.
The Ombre Painted Crate

Achieve a sophisticated, modern look using simple paint techniques. Take a basic wooden crate or box and paint the bottom third in a deep spring color (e.g., navy or forest green). Gradually blend the color upward, diluting it with white or gray until the top third of the box is a very pale shade. This subtle ombre effect draws the eye. Once dry, fill the box with bright, multi-colored flowers like snapdragons and petunias whose height emphasizes the color gradient on the box itself. This technique adds depth without needing extra hardware.
Burlap and Twine Wrapped Box

If you have a container that isn’t particularly attractive, burlap is your best friend. Cut sheets of rough burlap to fit the exterior of the box, securing it with hot glue. The rough texture immediately adds a warm, organic feel. Wrap thick decorative twine haphazardly around the center of the box several times, tying it off in a simple knot or bow. This design pairs beautifully with loose, floppy flowers like poppies or fringed tulips. The organic textures look fantastic against white or light stone porches.
Monogrammed Initial Box

Personalize your porch with a standout initial. Purchase a wooden initial letter (such as ‘E’ for Easter or your family surname initial). Paint the letter in a bold color (gold or black) and mount it directly onto the center of a painted flower box. If the box is deep enough, you can even use small succulents or moss to spell out the initial directly on the soil surface, rather than mounting the wood. Use structured, formal plants like boxwood shrubs or small topiary for an elegant, manicured finish.
Bright Daffodil Basket Liner

For a softer, more fluid look than a traditional wooden box, use a large, shallow woven basket. While baskets aren’t typically good planters, you can use them as a decorative cachepot. Place a standard plastic liner or shallow plastic tray inside the basket. Fill this liner entirely with potted, vibrant yellow daffodils and miniature narcissus. The abundance of sunshine yellow spilling over the rustic texture of the basket creates an iconic springtime statement, embodying renewal and warmth.
Faux Grass and Tulip Runner

This narrow design is perfect for adorning a dining table or a fireplace mantle. Use a long, very shallow wooden tray. Line it with florist foam. Securely glue thick sheets of realistic faux grass (available at craft stores) to cover the foam base. Next, insert faux tulips (or real cut tulips in water picks) in a single row down the center. This centerpiece is low-maintenance, won’t shed dirt, and provides a continuous visual line of spring color inside your home.
Weathered Washtub Display

For large entryways or gardens, scale up your planter. Use an antique or faux-aged metal washtub. The deep basin allows you to layer large flowers and plants effectively. Plant tall, established lilacs or rhododendrons in the back for height, followed by a middle layer of colorful pansies, and finish the edge with trailing ivy. The size and shape of the tub give the display an immediate focal point, bringing a touch of vintage garden charm to your outdoor space.
The Chevron Pattern Box

A simple geometric pattern can update even the plainest plastic or wood container. Use painter’s tape to mark out a bold chevron or zigzag pattern on your box. Use two contrasting paint colors—we love light gray and bright coral for Easter. Paint the sections and allow them to dry fully before peeling off the tape for sharp, modern lines. Because the box is so visually active, choose simple, solid-colored flowers like pure white alyssum or green foliage plants to fill it, preventing visual overload.
Polka Dot Teacup Planters

If you don’t have space for a large box, create a miniaturized, dainty version. Gather several mismatched vintage teacups. Drill a small hole in the bottom of each cup for drainage, or use them as cachepots for small succulent plugs. Arrange the teacups neatly inside a very small, flat wooden tray. Use fine-tipped markers and craft sealant to add simple pastel polka dots to the tray’s perimeter, reinforcing the delicate, playful theme of the teacups.
Vintage Book Page Decoupage

For a truly unique and sophisticated look, try decoupage. Tear pages from old or unwanted books (ensuring the paper is thin enough). Use Mod Podge to affix the pages haphazardly onto a small wooden box, creating overlapping layers until the entire exterior is covered. Once dry, seal everything with another coat of Mod Podge for protection. This detailed technique requires care and patience, similar to achieving the perfect, delicate layers needed for dishes like 16 Baked Eggplant Parmesan Tips for Perfection. Fill this literary container with simple baby’s breath or delicate maidenhair ferns to complement the antique paper texture.
Twig Fencing Border Box

Gather thin, dry twigs (about 1/4 inch thick) from your yard. Take a standard plastic planter and use floral wire or hot glue to secure the twigs vertically around the entire perimeter, creating a charming miniature picket fence effect. Ensure the tops are relatively even. Tie a simple moss-green velvet ribbon around the center for a finishing touch. This design looks lovely filled with primary-colored spring flowers like deep red geraniums and yellow pansies, offering a natural yet polished curb appeal.